Olive groves in the hills near Florence, terracotta roof tops, dark green cypress trees; all these elements combine to create a richness of color that defines the Tuscan landscape. The dragging technique, producing the appearance of fine lines or grains, exemplifies this natural simplicity. In addition, the linearity of this treatment helps heighten the visual continuity of the room.

For use on walls, furniture, objects, and in fine arts paint techniques.
A dragging finish produces the appearance of fine lines or grains. Especially effective on doors, trim and moldings, dragging acts as a complement to wall surfaces that have been treated with another decorative paint effect, mural painting or plaster treatments such as fresco and stucco lustro, polished plaster. Wall surfaces are occasionally treated in a dragging method.
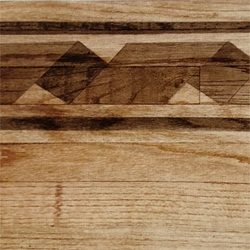
This process imitates the appearance of individual pieces of wood inlayed as a border to a wooden floor. A variety of patterns can be created, often imitating an assortment of wood types such as mahogany, oak, pine, ebony and maple. I’ve found this treatment to be a successful method of creating a period feel within a range of styles. And since there are very few design limitations you can create wonderfully unique floors to fit your style.
TIPS
Let "saggy" glaze set. If glaze is too fluid and continually “sags” or runs, allow to set momentarily then return and work glaze with a dry brush until smooth. Be aware that latex glazes set quickly.
Work from the top down. When glazing, experience tells us it's easier to work from the top of the wall to the bottom. If you start at the bottom and work upward, any drips or spills occurring can damage already treated lower portion finish.
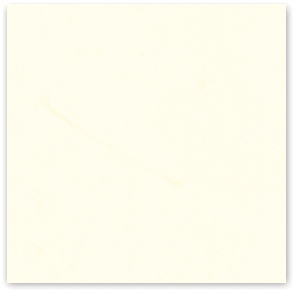
Base Color Linen White - Latex Eggshell
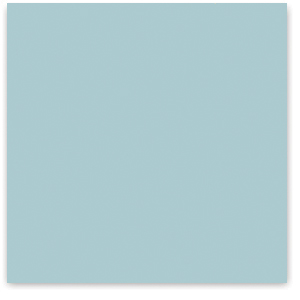
Glaze color Celadon Mist
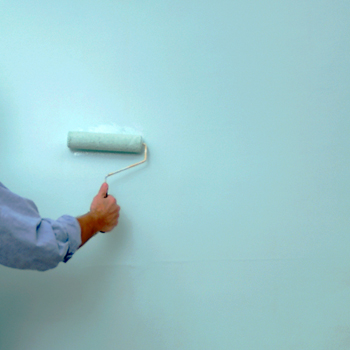
Step 1: Apply base color.
Linen White used as a base color allows the darker Celadon glaze to have depth and richness of tone. It helps establish the needed contrast that will reinforce the straight directional motion of the dragging technique. Use your roller to apply an even base coat, working in straight up and down stokes, from top to bottom, across the wall surface.
Step 2: Mix glaze.
The mixing ratio of paint to glaze coat is as follows. Add 2 cups of latex glaze coat, 1 cup Celadon Mist paint and 1/2 cup water. If you are working on a large room then use a full can of glazing liquid and increase the paint mix to 2 cups paint to 4 cups (1 Qt) glazing liquid, to 1 cup water.
Finishing Venetian Plaster with natural polished marble effect
Lithos is the contemporary version of the famous ancient Stucco Veneziano. It is a beautiful and highly refined decorative finish for hotels, offices, shops, exhibition halls, living rooms, etc. Ideal for all types of interior surfaces such as cement renders, Gypsum plasters, prefabricated panels wood and its by-products, as long as sufficiently smooth. With the range of colours and the applicator’s capacity and inspiration, it is possible to attain a variety of designs and chromatic effects. The resulting coating, in addition to being highly attractive, is abrasion resistant and washable.
Spread rate: 35 to 45 sq. ft. per quart.
0.8 - 1.0 kg/m² (for a recommended dry film thickness of 1,0 mm)

Step 3: Saturate the surface
Use a sponge for the water and the clean 4 inch brush to apply the color glaze. Wet the sponge with water, and dampen surface. Work one area at a time.
Saturating the surface first allows the glaze to go on fluidly and evenly.
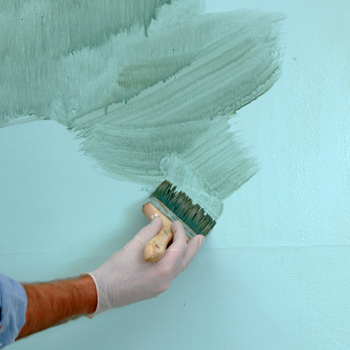
Step 4: Brush on glaze.
Dip the brush in the glaze, and brush over dampened area to spread glaze. Work evenly over area for full coverage. Make sure not to leave any untreated areas.
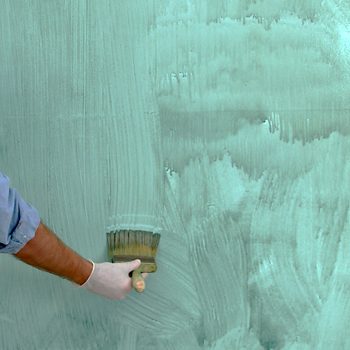
Step 5: Drag through glaze.
With a clean, dry bristle brush, use a firm hand and begin by dragging the brush evenly through the glaze from the top of the wall to the bottom. This will remove some of the freshly applied glaze from the surface, revealing the base color and producing a dragged, lined texture.
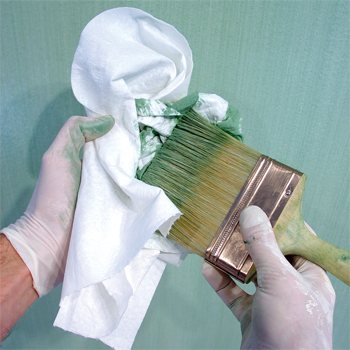
Step 6: Remove excess glaze from brush.
Regularly wipe the brush dry with a clean rag to remove excess glaze and to insure a fresh drag pattern. Work evenly over surface.
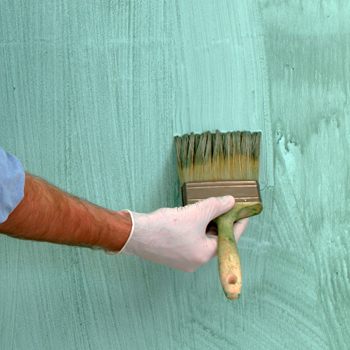
Step 8: Finish dragging and seal if desired.
Keeping your brush as dry as possible, complete the treatment with one final movement up and down from the beginning of the wall to the end.
For surface protection, apply a water-based varnish after dragged surfaces have dried completely (24 hrs.) for surface protection.
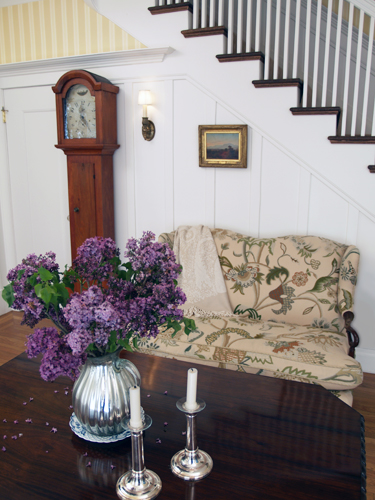
Colonial Amercians drew inspriation from their European heritage. Curent design styles would filter across the ocean and become reinventedin early America. Proportion and scale took reign over ornementation, A neutral color palette of grey blue, greens and rose pinks is readily apparent.
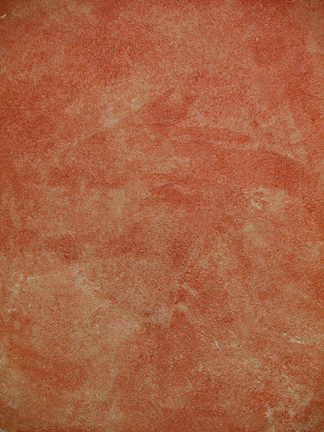
Stucco Rustico is a Traditional interior and exterior textured plaster that epitomizes the rustic old world charm commonly associated with Tuscan environments. I love this treatment for its ease of application and the natural, organic glazed appearance that results when using mineral based plasters and glazes. Whether a rough application or a smooth finish, this treatment holds true to the test of time and, in fact, feels as if time itself stopped to wash the walls personally.
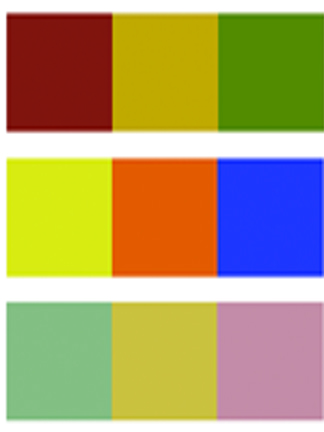
The Rustic Style color palette falls within a distinct range of color tones and is essential in creating a successful Rustic interior. By using the appropriate color tones you can create a variety of design styles ranging from Period and Historic, regional or thematic. Color helps define our experiences within an interior and exterior environment. It affects us on a physical, emotional, and spiritual level and can be calming and passive, expressive and vital.
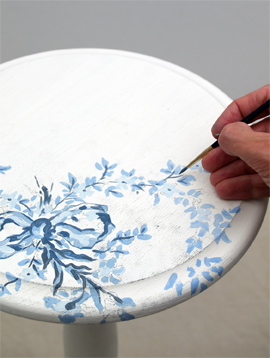
Floral patterns used as accents in fabrics and furniture are common place details in the English Country home. These graceful and organic patterns complement the cozy interior of this style and work particularly well with lace window treatments, an heirloom tea service set and the natural and rustic charm of wooden ceiling beams and slightly irregularly textured walls.