White Faux Marble
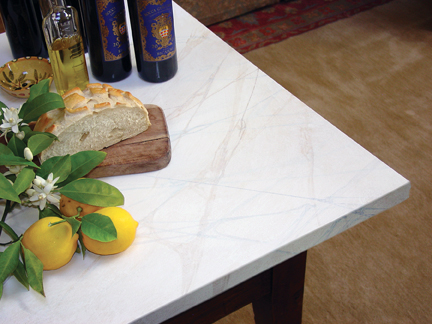
White Carrara Marble — This traditional white painted marble finish with deep veining is reminiscent of the northern Italian region of Carrara and its famous marble quarries.
Few finishes feel as timeless and quietly luxurious as white Carrara marble. Inspired by the legendary stone of northern Italy, this painted faux marble technique captures the soft movement, depth, and natural veining that have made Carrara a design classic for centuries. With a simple palette, a few traditional tools, and a step-by-step process, you can recreate the elegance of real marble on furniture, panels, and architectural details — transforming everyday surfaces into something enduring and refined.
Painted Marble Finish
In Italy, the word marble is synonymous with Carrara, after the great marble-quarrying region in the north of the country. For centuries, marble has enhanced interiors worldwide. Creating the impression of real marble in your home can quickly elevate the presence of any furniture or object. It adds interest and charm and transforms everyday pieces into heirlooms. I’ve chosen this painted white marble for its rustic simplicity—yet it also provides the foundation for creating many other marble varieties. Your imagination is the only limit.
Rustic Style Classic Elegance
Stucco Rustico is a traditional interior and exterior textured plaster that epitomizes the rustic old-world charm commonly associated with Tuscan environments. I love this treatment for its ease of application and the natural, organic glazed appearance that results when using mineral-based plasters and glazes. Whether applied rough or finished smooth, it holds true to the test of time—and feels as if time itself stopped to wash the walls personally.
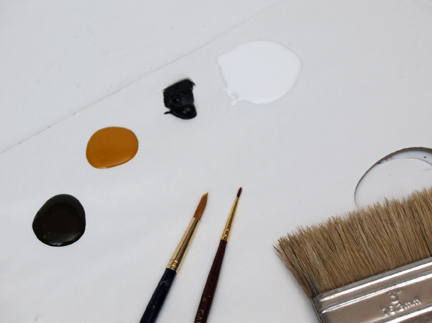
Color Palette
On a paper palette, put out some white paint (your base color), plus Raw Umber, Van Dyke Brown, and Yellow Ochre artist acrylics. These will be your marble “veining” colors.
You’ll also need a selection of fine artist brushes and a larger 3" brush for softening the veining lines you create.
Color palette — Earth Tones
Step 1: Prepare base
Begin by sanding the surface with 220-grit sandpaper to ensure a smooth finish. A white base color is ideal for this type of marble, allowing the veining process to create the interest and character. On smaller surfaces—like the top of this sideboard—I like to use a mini roller, which generally produces a smoother coat than brushing.
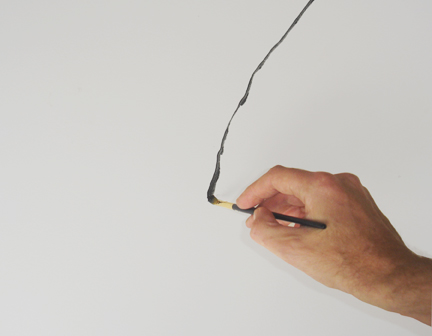
Step 2: Develop first phase
Load a ½-inch flat brush with a diluted mix of Raw Umber and Van Dyke Brown to create a deep, charcoal tone. Decide the direction you want the marble to flow—usually at a slight angle right-to-left, or vice versa. Starting at the top of the surface, pull the paint across the working area while gently twisting the brush. This creates an irregular thick-and-thin line.
As you paint, “roll” the brush between your fingers to create swirls and odd character lines that strengthen the natural marble-like impression.
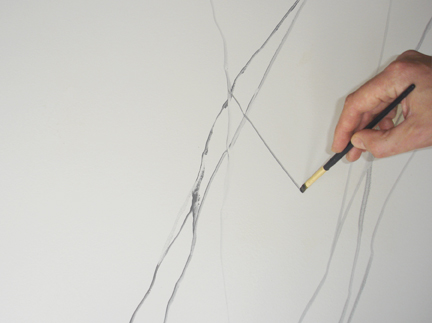
Step 3: Develop veining pattern
As you lay in the ground pattern, begin crossing and connecting the veining. Work in squiggly, irregular motions, leaving large open areas of the base coat visible.
The veining process is where the magic happens—add as many layers as you want, but keep stepping back to make sure the pattern still feels natural.

Hydrocote Polyshield Clear Topcoat - Gloss or Satin
Water Based
Hydrocote Topcoat. Polyshield Clear topcoat is a water-based, non-yellowing polyurethane sealer with exceptional clarity. It dries quickly to a hard, durable finish and resists water and marring once fully cured. Polyshield is UV-stable to help prevent yellowing over time.
Hydrocote Polyshield is available in gloss and satin. It is non-flammable, non-toxic, and environmentally safe.
Step 4: Add secondary tone
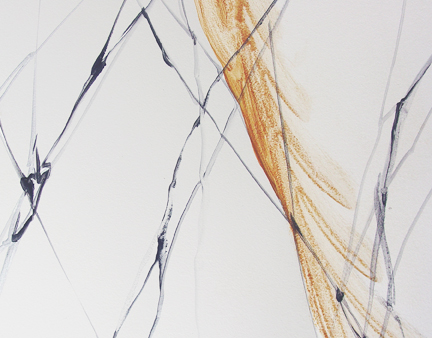
Create a wash of Yellow Ochre and use it as a secondary tone, painted in wider swatches to add interest and character to the otherwise white marble. Brush color over the surface in larger areas in some places, while allowing the layers underneath to show through.
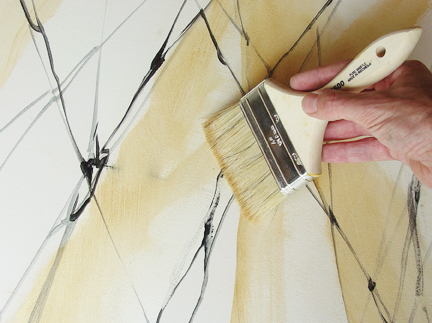
Step 5: Soften pattern
While the secondary wash is still wet, lightly soften and blend the pattern with a dry 3-inch brush. Use a gentle touch and brush in the direction of the marble.
Subduing the surface creates an aged feeling while “pushing” the colors back into a more muted tonality.
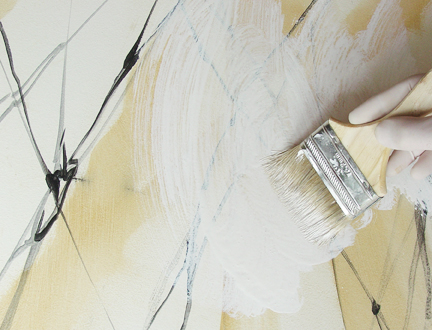
Step 6: Whitewash surface
Use a water-dampened rag to lightly wet the surface—this helps the whitewash remain fluid and extends drying time. Mix some of the base color with water to create a whitewash the consistency of cream, then brush it liberally over the marbled surface.
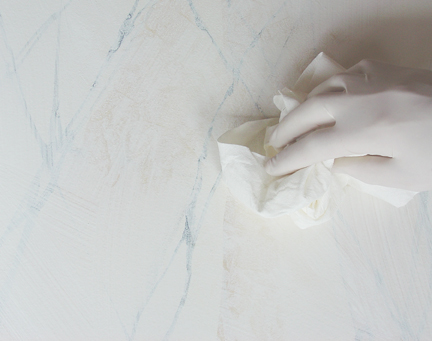
Step 7: Soften color with rag
Rub over the glazed surface to soften the color. Blot or dab the surface to create slight variation and texture.
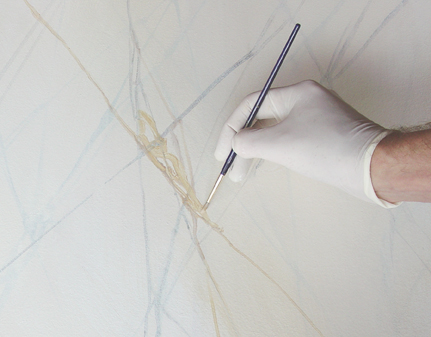
Step 8: Touch up veining
Add additional veining using a No. 3 round brush and a mix of Raw Umber and Antique White. Highlight a few existing veins within the surface, and occasionally deviate to create a new, errant vein.
Step 9: Apply a clear coat protective varnish
Using a large varnish brush, apply one to two coats of clear coat sealer. Hydrocote is a great option for this application and provides a long-lasting protective finish. Hydrocote Polyshield is available in gloss and satin. It is non-flammable, non-toxic, and environmentally safe.
Hydrocote Topcoat. Polyshield Clear topcoat is a water-based, non-yellowing polyurethane sealer with exceptional clarity. It dries quickly to a hard, durable finish and resists water and marring once fully cured. Polyshield is UV-stable to help prevent yellowing over time.
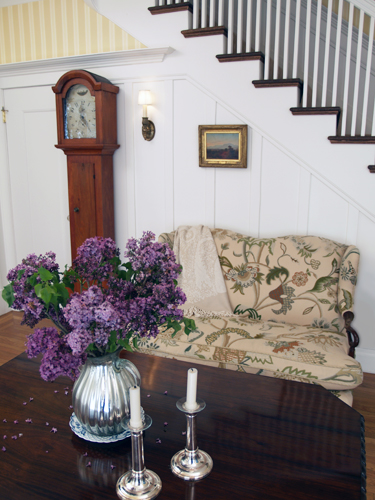
Early American Style
Colonial Americans drew inspiration from their European heritage. Current design styles would filter across the ocean and become reinvented in early America. Proportion and scale took reign over ornamentation; a neutral color palette of gray-blues, greens, and rose pinks is readily apparent.
Venetian Plaster
Polished plaster, or Stucco Veneziano, is a traditional wall treatment that provides a glossy, visually textured wall finish. Venetian plaster is a natural formula composed of organic ingredients, calcium, and acrylic binders. Polishing compresses the calcium, creating a marble-like finish—cool and hard to the touch.
This treatment is quite versatile, ranging from a rustic backdrop to a refined and elegant finish.

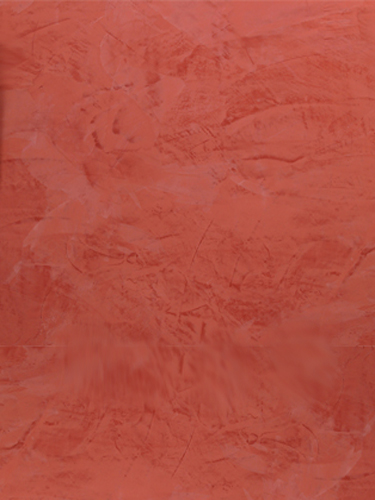
The Rustic Color Palette
The Rustic style color palette falls within a distinct range of tones and is essential for creating a successful rustic interior. Color helps define our experiences within an environment and affects us on physical, emotional, and spiritual levels.
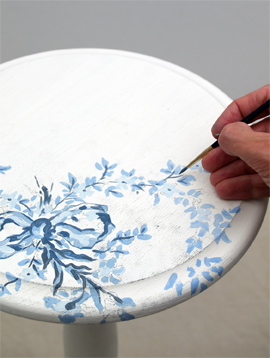
Painted Floral Details
Floral patterns used as accents in fabrics and furniture are common details in the English Country home. These graceful, organic motifs complement cozy interiors and pair beautifully with lace window treatments, heirloom tea service sets, and rustic wooden beams.