The loose, un-even quality to these tiles makes painted Delft tiles an ideal technique for the beginner or inexperienced do-it-yourselfer. Irregular lines, loose hand painted renderings add character and old world charm, easily achieved without any prior painting experience.
How artSparx helps you learn: Our step-by-step tutorials break the process into simple, repeatable stages—surface prep, sketching motifs, controlling watery paint flow, building soft shadows, and finishing with a protective sealer. You’ll also find related decorative painting lessons (marble, antiquing, wood graining, and more) that build the brush skills that make Delft-style tile work look authentic.
Discover a wide range of decorative paint and faux finish techniques through clear, step-by-step artSparx tutorials designed to make learning approachable, practical, and deeply rewarding. From foundational skills like color washing and stenciling to advanced applications such as gold leaf, antiquing, furniture painting, and mural work, each technique is carefully broken down so you can build confidence as you go.
artSparx tutorials guide you through both classic and contemporary finishes—including sponging, marbling, and wood graining—showing not just how the effects are created, but why each step matters. You’ll learn how tools, materials, color choices, and layering techniques work together to add depth, character, and hand-crafted detail to walls, furniture, objects, and architectural surfaces.
Whether you’re just getting started or refining professional-level skills, decorative art techniques offer a powerful way to personalize interior and exterior spaces. artSparx provides the structure, visual examples, and practical insight needed to turn inspiration into successful results—helping you avoid common mistakes and achieve finishes that feel intentional and authentic.
Build your creative toolkit, sharpen your technique, and gain the confidence to explore new ideas with guidance you can trust. With artSparx leading the way, these versatile, easy-to-learn faux finishing effects become reliable tools for lifelong creative expression.
For use on walls, furniture, and decorative objects
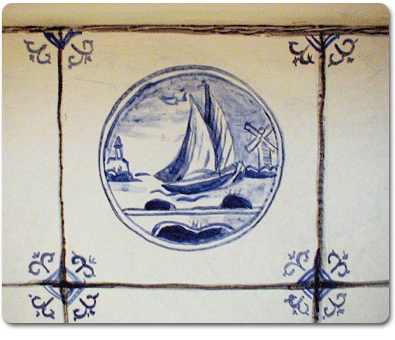
Delft tiles originated in Holland in the 1500s and are traditionally hand-painted ceramic tiles featuring classic motifs such as landscapes, flowers, animals, and sea-faring scenes. These designs are most often rendered in a distinctive blue glaze on a white background. While full-color versions exist, “Delft” has become synonymous with blue-and-white tilework.
In this tutorial, you’ll learn how to create painted Delft tile effects that are ideal for kitchen backsplashes, fireplace surrounds, decorative trays, furniture, and any surface where you’d like to add a touch of old-world charm.
For pattern inspiration, we recommend visiting a Delft reference site and selecting a motif that speaks to you.
Once you’ve chosen where to paint your Delft tile motifs, proper surface preparation is essential. If the surface already has a sound white or off-white paint finish in an eggshell, satin, or semi-gloss sheen, you may skip directly to Step 3.
Remove all nails and repair any damaged or cracked areas. Prime repaired sections as needed. Refer to the artSparx basic preparation guide for tips and techniques.
Apply a white latex eggshell paint, such as Benjamin Moore Antique White or Pratt & Lambert Designer’s White.
You may choose to paint only the area that will receive the Delft motifs, especially if you plan to use a different wall color above the tile area. However, painting the entire wall will also yield excellent results.
For this artSparx tutorial, we’ve chosen a kitchen backsplash as the working surface. This technique works equally well on other architectural features and decorative objects.
The Delft blue palette is wonderfully simple. You’ll only need two acrylic artist colors:
Tools include a paper palette, tape measure or ruler, level, pencil, and artist brushes.
Traditional Delft tiles are typically 6-inch squares. Measure your surface and divide by 6 inches. If the spacing isn’t exact, adjust slightly (5¾″ or 6¼″ works well). Painted tiles allow flexibility that real ceramic tiles do not.
Mix Raw Umber and Cobalt Blue in roughly equal parts to create a soft “black” tone. Using a No. 6 artist brush, paint directly over the pencil grid lines.
Keep the application loose and slightly irregular—perfection is not the goal. These imperfections enhance the handmade character.
Using the same dark mix, reinforce the corners by adding short horizontal and vertical strokes at each grid intersection, forming a subtle “+” shape.
These irregular corner marks create the illusion of depth and individual handmade tiles.
To simulate the fired ceramic appearance of traditional Delft tiles, create a blue-grey glaze by mixing Cobalt Blue with a small amount of Raw Umber and combining it with Floetrol, latex glazing liquid, or scumble glaze.
Working in sections, brush a thin, loose glaze over the surface. While still wet, gently blot with a clean cotton rag to create a soft, mottled texture.
The effect should remain subtle—continue blotting until the surface feels softly aged.
Classic Delft tiles often feature simple corner embellishments and occasional decorative motifs scattered throughout the design.
Mix Cobalt Blue with just a touch of Raw Umber to slightly deepen the blue. Paint two diagonal lines in each corner to form a diamond shape, then add a small curling motif.
Irregularity is encouraged—it adds charm and authenticity.
Choose motifs such as landscapes, ships, animals, or florals. Aim for one decorative tile every 5–10 tiles.
Lightly sketch the design with a pencil or transfer a pattern. Paint using the same blue mixture used for the corner details.
Work loosely and intuitively. The overall impression of the tiled surface is more important than any single tile.
After the paint has fully dried (4–6 hours), apply a water-based varnish. For walls, use a low-lustre or satin sheen finish.
Clean brushes and tools with warm, soapy water.
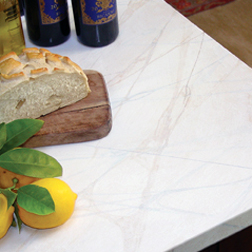 Faux Carrera Marble
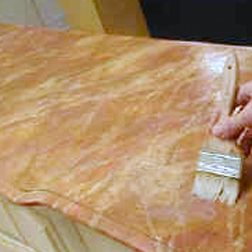 Faux Ochre Marble
 Floral Accents
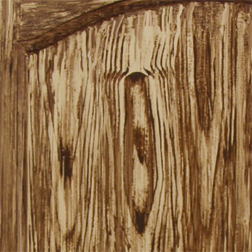 Faux Wood Grain
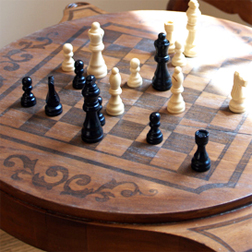 Painted Game Table
 Simulated Red Lacquer