Color Washing
A timeless glazing technique that layers translucent color to create soft, floating depth—from subtle parchment washes to richly atmospheric surfaces.
Step-by-step tutorial.
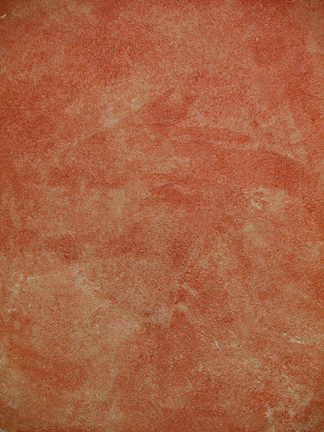
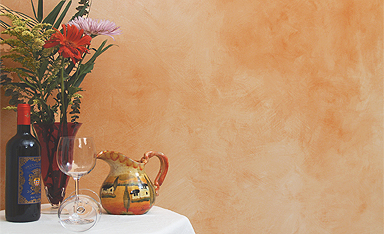
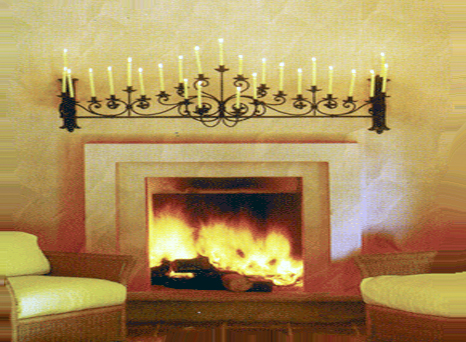
This decorative effect creates the appearance of floating color. Soft and watery, or bold and striking. The color density varies over the surface and creates appearances from parchment to the softness of an evening sky or the deepness of watery depths. A subtle finish, with little texture, it is an ideal effect to create mood in a room, background ambience. When using earth tones the color wash can have a slightly aged appearance and is ideal for irregular wall surfaces.
Colorwashing - Soft, floating color
For use on walls, furniture, objects, and in fine arts paint techniques.
Colorwashing is one of the oldest and best loved wall paint effects. It is as popular today as it was 200 years ago, and can be seen on walls in homes, restaurants and commercial interiors world wide. This treatment creates a feeling of soft, floating color, and is the ideal method for creating a rustic charm and timeless look in your home. I’ve chosen to begin the series with this technique because it is one of the foundation processes for many faux finishes, including antiquing methods, general wall glazing and plaster effects and painted furniture techniques.
Blending Traditional and Contemporary Design
Stucco Veneziano - Venetian Plaster!
Inspired by the ornate plaster-work of Renaissance Italy, decorative plaster has a millennial history, with origins dating back to the Rome of the Caesars and in the art of Ancient Greece.
It was Andrea Palladio, a famous Italian architect, who in the XVI century re-discovered it through his studies and re-proposed it in the splendid Venetian villas that are still to this day the distinguishing mark of his career. Stucco Veneziano is an aesthetic solution that step by step, conquered Venice and Lombardy, then Italy, and finally entire Europe in the XVII century. Today, venetian plaster Stucco Veneziano restores the splendor of a classic and prestigious finish.
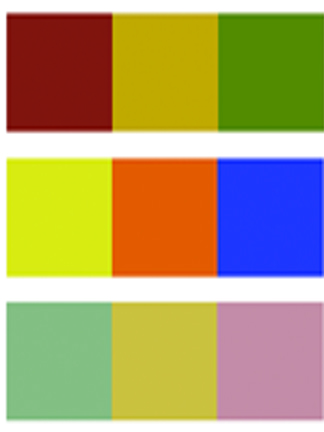
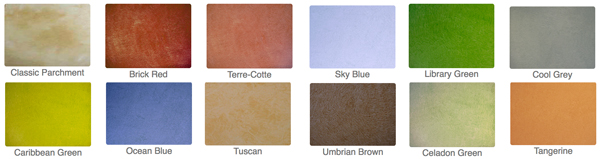
Color Palette
TIPS
Mix enough glaze: The amount of glaze you mix up depends on the size of the area you are working on. If working a large area, use a full can of glazing liquid. I’ve found it is always better to have extra glaze at the end of the project than not enough.
Work from the top down. When glazing, it's recommended to work from the top of the wall to the bottom. If you start at the bottom and work upward, any drips or spills occurring can damage already treated lower portion finish.
Base Color Linen White - Latex Eggshell
Glaze color Golden Sunflower
Step 1: Apply base color.
To create the feeling of sunny Tuscan walls I’ve chosen and applied an eggshell finish latex paint in a cream tone as my base color, called Linen White. Before moving to the glaze application I’ll allow the painted wall to fully dry (6-8 hrs).
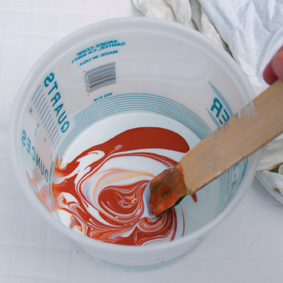
Step 2: Mix and test glaze.
In a large bucket I’ve added 2 cups of latex glaze coat, 1 cup of the Golden Sunflower paint and 1/2 cup water and to create my glaze mixture. Optional: Mix in 1/4 to 1/2 cup water based varnish to act as a hardener for your glazed surface and prevent color bleeding when washing or applying additional layers of glaze. Be aware however, that this will cause the glaze to dry quicker, shortening your working time.
Experiment with fluidity and color strength by sampling a small swatch of your glaze on the wall surface and softening out with a dry brush. You can adjust the color strength by adding more paint for a darker look, or more glaze coat for a softer, paler effect. Don’t dilute the glaze with too much water at this time, as this will be your ‘master glaze color’.

Pre-mixed Glazes
Ready, set, GO!
Getting going with these premixed glazes. Select one of our pre-mixed glaze colors or create your own. We custom mix any color from all major paint manufacturers. Just pick your own color from any swatch book and let us know the paint name and number and we'll send you the right glaze - interior or exterior - custom matched to your liking.
Create classic effects such as colorwashing, dragging, striee, antiquing effects, furniture effects and much more!
Step 3: Thin the glaze.
Place a portion of the prepared glaze color in a 2.5 qt. bucket. Add water slowly until you reach a consistency similar to cream. Experiment with this thinned glaze on the wall to determine color depth and ease of mobility over wall area. Fill your second bucket 2/3 full with water.
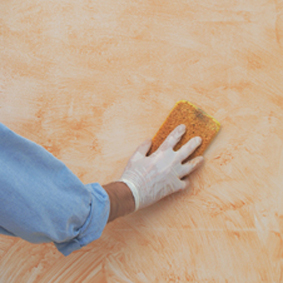
Step 4: Saturate Surface.
Prepare both sponges by rounding the corners and edges, trimming them with scissors. Ordinary household sponges will do fine (1 ½ inch thick and approx 6 inches x 4 inches).
Use one sponge for the water and one for the glaze color. Wet sponge 1 with water, start at the top of the wall and dampen the surface. Work in one area at a time, moving methodically forward over wall surface.
Saturating the surface first allows the glaze to go on fluidly and evenly.
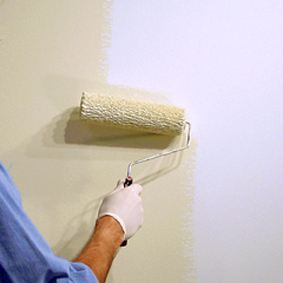
Step 5: Apply glaze.
Dip the second sponge in glaze and rub over dampened area of wall and spread glaze. Work evenly over area for full coverage. Varying the pressure applied to the sponge will leave areas with slightly denser concentrations of glaze.
Continue to soften glaze color working in a criss-cross manner until desired smoothness is achieved. Work quickly and conscientiously, keeping exposed edges dampened with water.
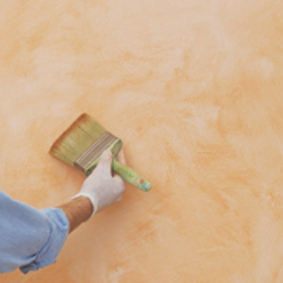
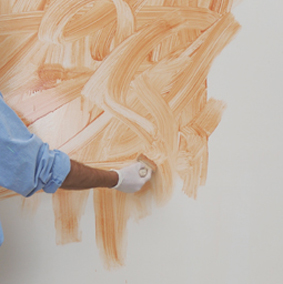
Step 6: Soften glaze.
Using the 4 inch brush, soften the glaze effect by brushing in wide, soft strokes. Vary the direction of the brush stroke to insure consistent blending throughout. When glazing larger walls you may chose to work in sections so your glaze doesn’t set up while you are working. Repeat the above process however, do not put glaze on the previously glazed edge but rather apply within 1 inch or so and soften into previous edge with sponge or dry brush. At corners, apply glaze to within ½ to 1 inch of edge and with a dry brush, work into corner, then soften and smooth with light, gentle movements.
Step 7: Optional varnish.
To protect the surface, a clear water-based varnish may be applied after color-washed surfaces have dried completely (24 hrs). For wall surfaces it is recommended to use flat (matte) finish, eggshell or low-luster finish varnishes. Clean up with warm, soapy water.