Rag Rolling - The perfect 5 step faux finish!          

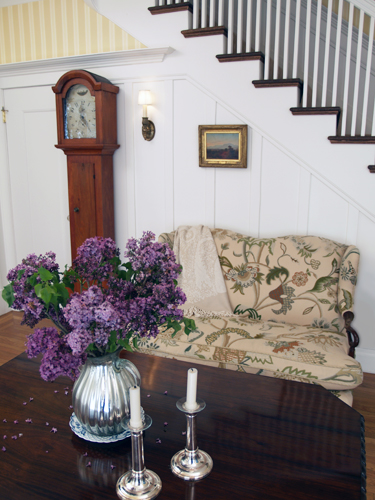
This simple method for creating softly textured walls stands the test of time. And though I’ve found this technique to work well in a variety of styles, the Early American theme seems to suit it particularly well. To successfully create the feeling of this period style it is essential to use a color palette that was common to the era and are generally classified within the ‘Historic’ color palette’s offered by many commercial paint manufacturers today. I’ve chosen a soft blue with a slight grey cast to it. This color tone will compliment many of the period furniture, objects and particularly paintings that decorate the interiors of the Early American home.

Ideally suited for latex, fast drying, non-toxic paints. Flat or eggshell sheen is recommended for interior wall surfaces.

Hand Painted Floor Cloth

Freshen any room with this creative checker board painted floor cloth.

Antique painted floor cloth

The magic of a painted floor cloth can transform a common space into a unique and beautiful expression of you and your family’s personality. Use these versatile cloths for entrance floors, children's rooms, porches, or just about anywhere. Due to the hand painted nature of each floor cloth there is a great opportunity to customize an interior detail to the home, adding quirky elements and personal touches that help create these singularly unique painted floor cloths.

more


Color Palette

Tips

This process is known as the ‘Additive Glaze Method’ because you are adding color to create the desired decorative effect. The treatment affords considerable flexibility in application, as drying times for your secondary color are not important. In fact, I’ve started this finish and have had to leave it mid-process, only to return a day later and complete it without a missed beat, or rag in this case.

Base color

rag roll base color

Select a base color of your choice.

Top color

ag roll base color

This color is about 2 steps lighter on a paint chip than the base color.


rag rolling

Step 1: Applying the base color.

Preparing the working area as necessary. Using a ¼ inch nap roller, apply the base color, Blue Harbor, in straight, vertical motions from floor to ceiling. Before moving to the rag rolling application, allow the painted wall to fully dry (6-8 hrs).


rag rolling

Step 2: The ragging process.

Pour a portion of the secondary color, Colonial Mist, into a 2.5 quart bucket. Take a clean cotton rag and completely submerse and saturate the rag with the secondary color. Use a stir stick to facilitate this process, folding the rag into the paint if necessary. Make sure the rag gets completely saturated with paint.


mica powder

Mica Powder

Highlight your project with these high quality mica powders.

In Stock

Mica Powder. - Perfect for artists and craftsmen alike, these powders have many uses and mix with clear vehicles ranging from acrylic and oil based mediums to shellac. You control the pigment content - use very little for a translucent veil of metallic or use more for a solid metal look. Intermix colors to create your own mica palette. Ideal for 'Flash Gilding', where you apply the mica directly over size that is at perfect tack.

Buy Now!


Step 3:

Taking one corner of the paint filled rag, pull the rag through the thumb and forefinger of your other hand to remove all excess paint.

rag rolling

rag rolling

Step 4:

Open rag and loosely create a ‘ball’ in your hand. Keep in mind that it is this ‘ball’ form that will create your rag pattern. A loose rag and a light touch will prevent the rag from flattening upon application and insure an interesting pattern movement.


rag rolling

Step 5:

Begin to dab rag over your wall surface, using a light touch. Continually twist and move your wrist as you dab the rag to vary the pattern being created. To create depth and visual interest you’ll purposefully allow the base color to show through. Regularly open the rag and reposition in your hand to maximize paint distribution and to vary the texture. Work evenly over surface.


Step 6:

Continue over wall surface until completed, dipping rag into paint regularly, straining through fingers, to refresh paint saturation.

Step 7:

For edges and corners, use a very small rag saturated with paint. A small artists brush or 1 inch dry brush dabbed in paint will help get into tight corners.

Step 8:

Clean up with warm, soapy water. Record the paint color numbers for future reference in the event that touch ups are needed.


Related Features