Painted Dresser
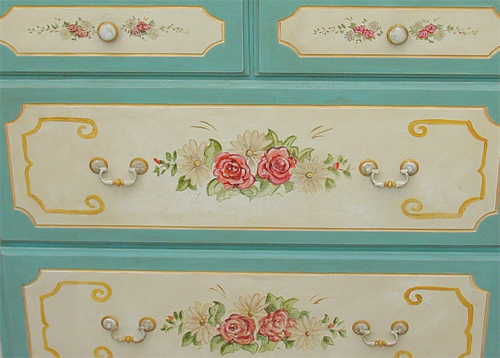
French Country Dresser
In the sun filled shops and cozy tea rooms of southern France painted furniture abounds. Using everyday dressers, painted with decorative florals over regional color schemes one quickly acknowledges the simple beauty of the Provincial design aesthetic. I’ve chosen a dresser that I found in my local unfinished furniture shop, this one having inset panel features on the front of each drawer, which I’ll use to frame the floral details I intend to paint.
Special Feature
English Country Style
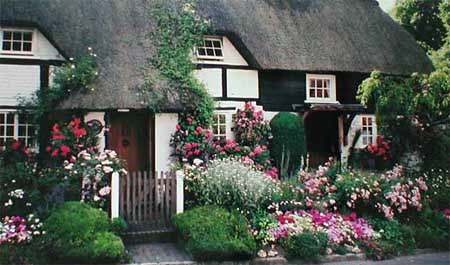
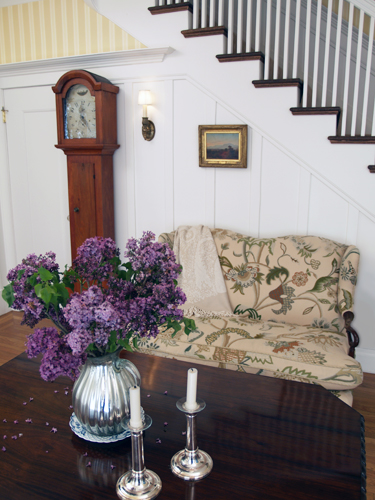
In the English countryside, pretty villages dot rolling hills and cobblestones line narrow medieval streets. Come in through the garden gate, and you'll find a steep thatched roof overhanging ancient leaded glass windows. Old garden roses creep around the carved oak door. The grounds, whether a picturesque cottage garden or the rolling parkland of the local manor house, are lovingly cared for. Everything is fresh, tidy, and welcoming.
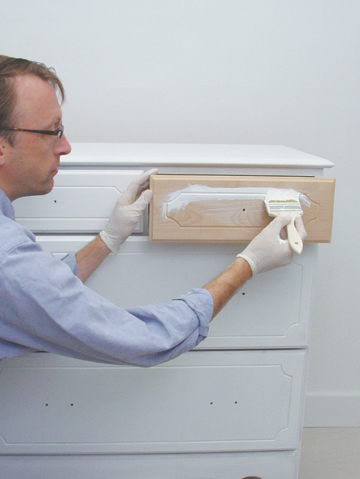
Step 1:
Base Preparation
I use a water based primer and a mini-roller to prime the dresser. A 1 inch brush will help complete the edges and details. After this has dried it will be necessary to lightly sand the entire surface, as the initial primer coat tends to raise the fibers of the unfinished wood, creating a roughness that needs to be removed.
Step 2:
2. Base Color Application.
Apply the base color Provincial Green over the sides and front of the drawer edges leaving the top and inset drawer panels un-painted. If your dresser does not have inset panels, you can follow step 3 to create the appropriate pattern.
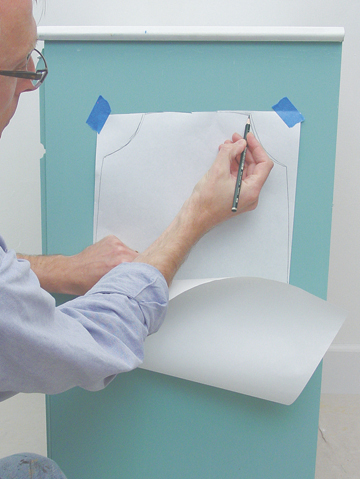
Step 3:
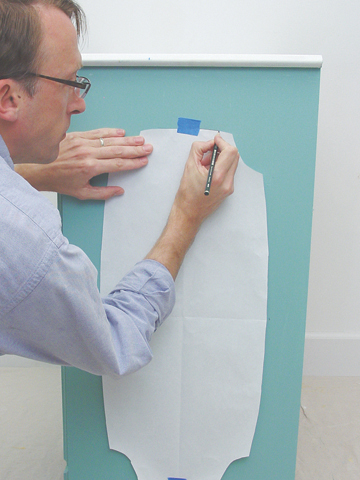
Creating your panel outline.
Take a blank sheet of paper that is approx. the size of the side panel. First measure the half way point from top to bottom of the dresser and make a pencil mark at this point. Next, measure 4 inches from the top and 3 inches from one side and place the papers edge on these guide points. Loosely sketch once corner detail, finishing at the half way points of both the horizontal and vertical position./p>
Step 4:
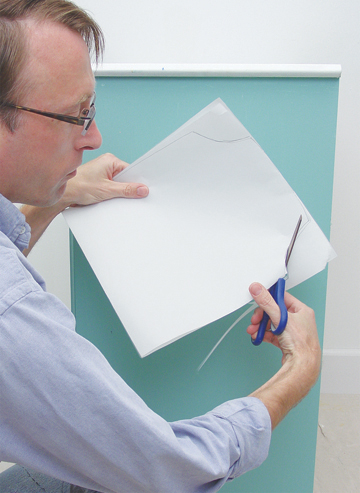
Fold the paper into ¼’s and cut out the shape you’ve created. Once unfolded you will have created a perfectly symmetrical pattern.
Step 5:
. Place the pattern onto the side panel and trace the outline with your pencil. Repeat on the other side of the dresser. I use this same method to create a silhouette pattern on the front of each drawer, if the dresser you are working on does not have recessed panels.
Step 6:
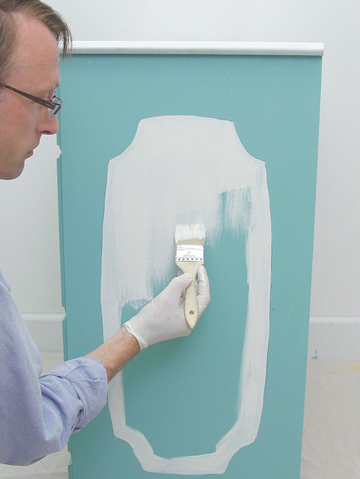
Paint the interior of these panels with white latex paint. At this time I also apply a finish coat of white paint on the top of the dresser.
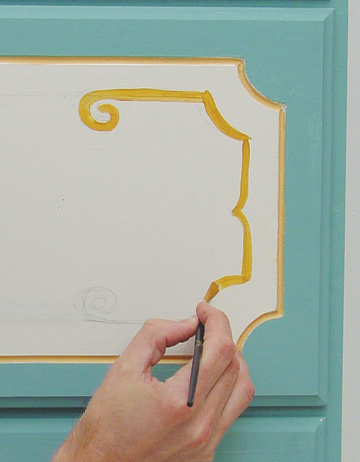
Step 7:
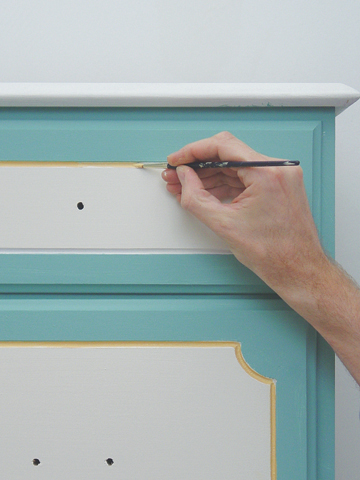
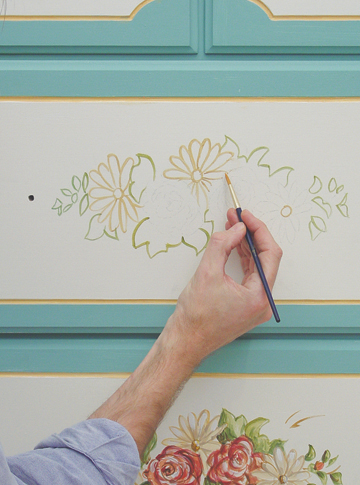
Mix Yellow Ochre and Cadmium Yellow Medium on a paper palette to create a rich golden hue. With your No. 5 brush, outline the ‘panels’ you’ve just created.
Step 8:
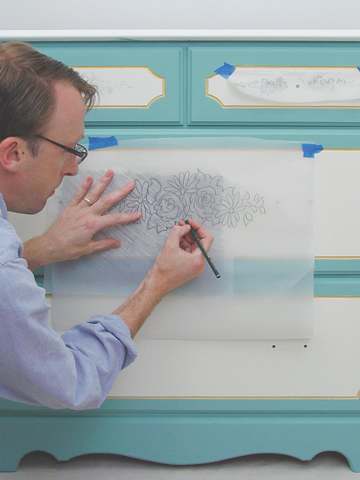
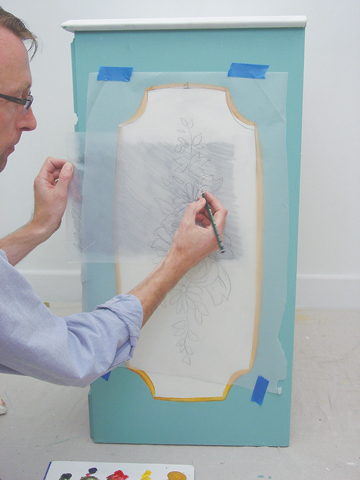
Using the floral pattern provided in this book on page xxxx, scale the image to an appropriate size so it fits comfortably within the ‘panels’. Follow the information on ‘How to scale an image’ found on page xxxxx. Trace the image onto your tracing paper and position the drawing over the panel, taping it down once you have agreed upon its position. Slide your homemade ‘transfer paper (page xxx) under the image and trace the outlines to leave an impression on the dresser.
Painted Inlay Floor Border
This process imitates the appearance of individual pieces of wood inlayed as a border to a wooden floor. A variety of patterns can be created, often imitating an assortment of wood types such as mahogany, oak, pine, ebony and maple. I’ve found this treatment to be a successful method of creating a period feel within a range of styles. And since there are very few design limitations you can create wonderfully unique floors to fit your style.
Step 9:
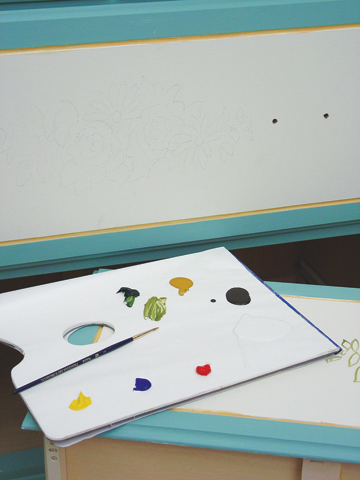
Load you palette by adding a small amount of Raw Umber, Yellow Ochre, Cadmium Red, Ultramarine Blue, Cadmium Yellow Medium, Sap Green and some white latex paint you used as the base color for you panels.
Step 10:
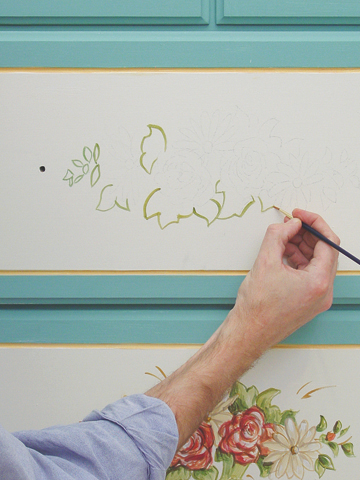
Begin the painting by outlining your forms. I’ve started with the leaves. Mix Sap Green with a small amount of Yellow Ochre. Use the No. 2 brush for this step.
Stencil Brush 432
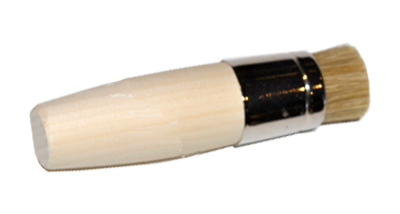
Stencil Brush Stencil brushes are special brushes with short firm bristles. When used properly they distribute a thin and even layer of paint. This reduces the chance of getting paint under the edge of the stencil. Made in Germany
Step 11:
Paint the flower petal outlines with Yellow Ochre thinned with a hint of white.
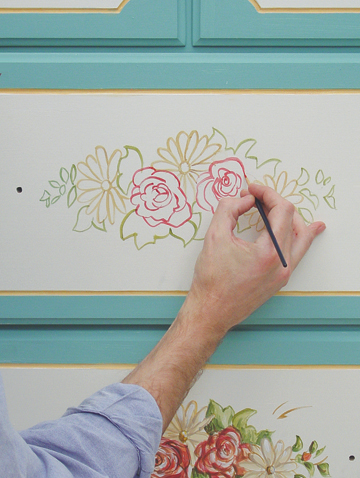
Step 12:
Next, I outline the rose petals by creating a darker red. Mix Cadmium Red with a hint of Raw Umber and Ultramarine Blue.
Step 13:
Begin filling in the forms, again starting with the leaves. Mix Sap Green with Yellow Ochre and wash the color over the leaf forms. You may want to lightly blot the paint to create a slight texture and diminish and brush strokes.
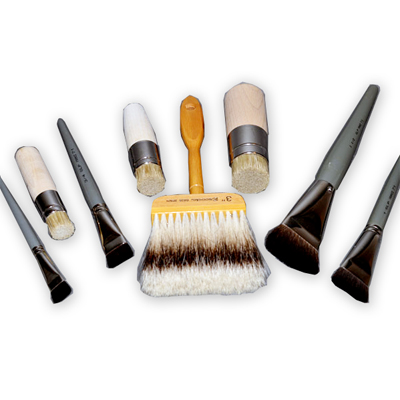
Artists Brushes
Finest quality natural hair brushes for the beginner to the pro.
What's your project? You may be working on canvas, or paper, or glass, or maybe clay? Our natural hair brushes include Sable, Badger, and a variety of Squirrel, Goat and Bristle options. You'll find great options for lettering and lining, flat mops for washing on color, or dusting gold leaf. Finely crafted in the US, Europe and Asia. Artist Quills - Lettering brushes - Fine Sable - Gesso Stippling - Flat Wash - Gilding Mops - Decorative Paint and Faux Brushes
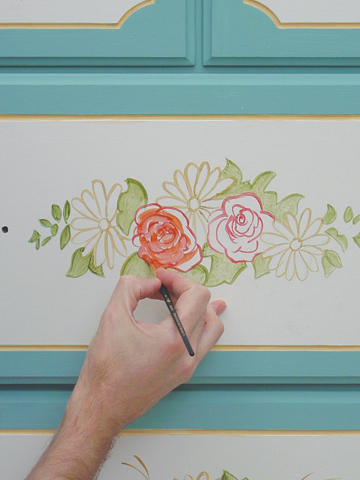
Step 14:
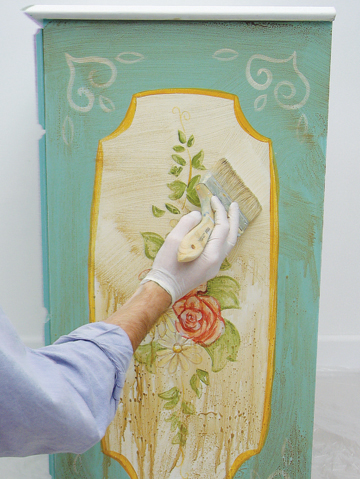
Begin adding dimension to the rose petals using the No. 2 brush by adding a darker red stroke (Cadmium Red and Raw Umber), followed by a lighter stroke (Cadmium Red, Raw Umber, White). Keep in mind this dresser is intended to be country and rustic, therefore it is not necessary to agonize over the actual form of the florals, trying to create depth and shadows. It should be painted in a loose and casual manner, with the rustic charm being exemplified after the final antiquing.
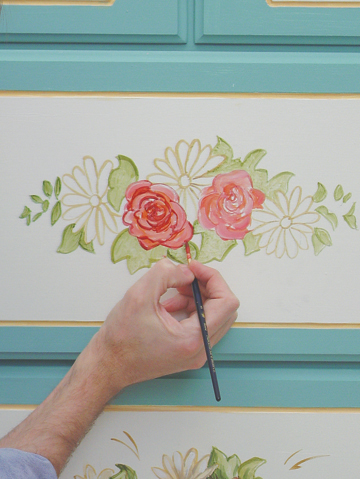
Step 15:
The rose petals should now be outlined once again with your darker red tone (Cadmium Red, Raw Umber and Ultramarine Blue).
Step 16:
Complete the rose petals by accenting each petal with a touch of pure white.
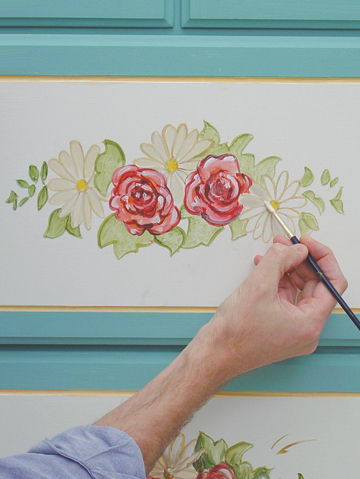
Step 17:
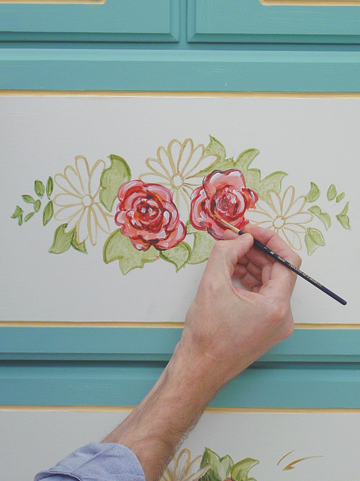
Add color to the daisy petals using Yellow Ochre, Raw Umber and white to create a light taupe color. The center of each flower can be painted with a Yellow Ochre/Cadmium Yellow Medium mix.
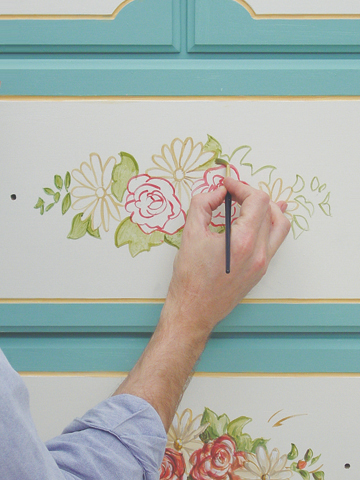
Step 18:
Accent the leaves further by creating ‘shadow’ areas. Mix Sap Green with Raw Umber and a hint of Yellow Ochre. Paint ½ leaf forms and add periodic center lines for the leaves to create depth.
Step 19:
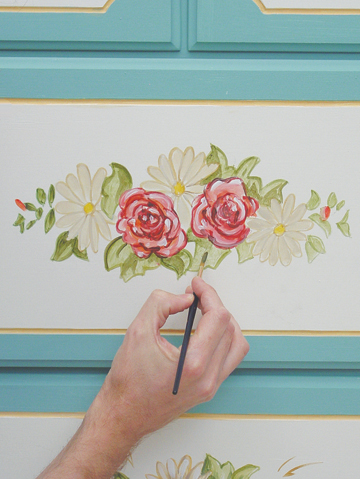
Adding Accents
I’ve added a simple line detail to complete the front panels. I’ve loosely sketched the form with a pencil, and then painted over it using the No. 2 brush with a Yellow Ochre/Cadmium Yellow Medium paint combination.
Step 20:
Painting additional elements
Proceed with the same method to create the side panels and small drawer areas of the dresser.

Step 21:
Distressing the painted furniture
I’ll begin the final antiquing phase by sanding the entire dresser with 220 grit sandpaper. I’ve found it is best to sand in one direction only. Vary the intensity of the sanding over the painted image, even removing the image partially in areas if desired. Also focus on the edges and corners of the furniture, sanding to raw wood in these areas is desirable.
Step 22:
Antiquing
The final step on the main body of the dresser is to apply an antique glaze. The process and glaze recipe is the same as in previous tutorials. For the exact color blend, refer to the Antiquing tutorial on page xxxx. With a 3 inch brush loosely spread the antique glaze over the dresser. A clean rag should be used to blot the surface, followed by the dry brush softening technique to smooth out the glaze and finish it off.
Step 23:
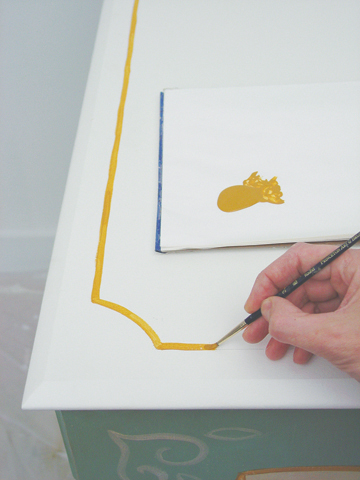
Finishing the top surface
Adding a simple line detail to the top of the dresser is enough to complete the furniture and create continuity between top and base. I’ve drawn a light pencil line along the edge of the top, about 1 ½ inch in from the edge. Adding a curve to connect each corner helps soften the linearity of the detail. Again, I’ve mixed Yellow Ochre and Cadmium Yellow Medium to create a golden yellow tone and paint over the pencil line with the No. 2 brush.
Step 24:
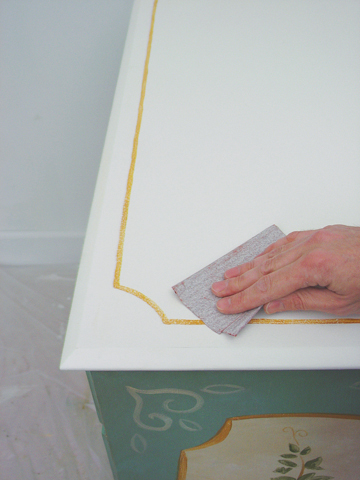
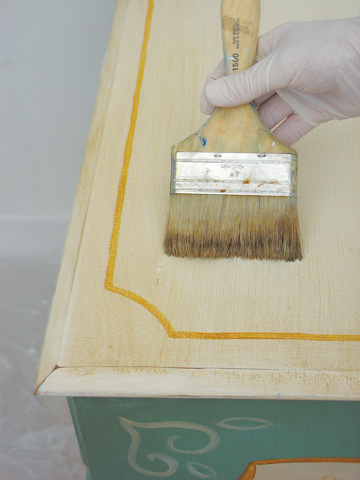
When the line is dry and I’ve erased and visible pencil marks, I sand over the surface, wearing on the corners and edges as before. Apply the antiquing glaze as before, softening with a dry brush.
Step 25:
A clear coat of Latex Satin sheen sealer is applied to the top as a protective coating and allowed to dry fully. It is not necessary to apply a sealer to the base of the cabinet, though you may wish for additional protection.
Early American Style
Colonial Amercians drew inspriation from their European heritage. Curent design styles would filter across the ocean and become reinventedin early America. Proportion and scale took reign over ornementation, A neutral color palette of grey blue, greens and rose pinks is readily apparent.
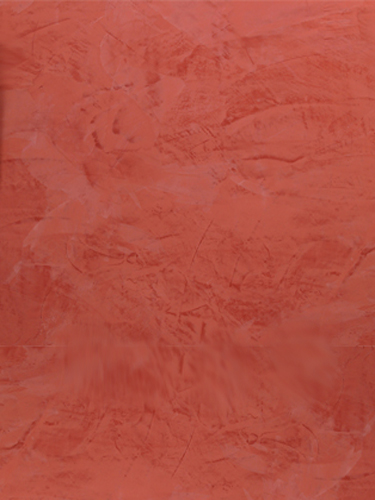
Venetian Plaster
Polished Plaster, or Stucco Veneziano, is a Traditional wall treatment that provides a glossy, visually textured wall finish. Venetian Plaster is a natural formula composed of organic ingredients, calcium, and acrylic binders creating a decorative paste plaster for interior applications. Polishing the surface compresses the calcium within the compound, creating a narble-like finish, cool and hard to the touch.
This treatment is quite versitile, ranging from a rustic backdrop to a refined and elegant finish.
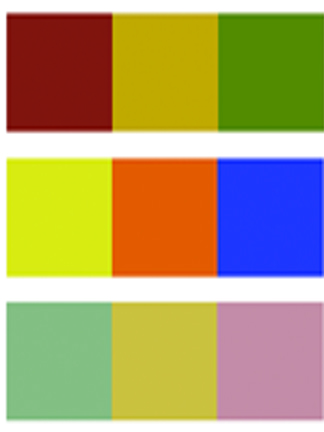
The Rustic Color Palette
The Rustic Style color palette falls within a distinct range of color tones and is essential in creating a successful Rustic interior. By using the appropriate color tones you can create a variety of design styles ranging from Period and Historic, regional or thematic. Color helps define our experiences within an interior and exterior environment. It affects us on a physical, emotional, and spiritual level and can be calming and passive, expressive and vital.
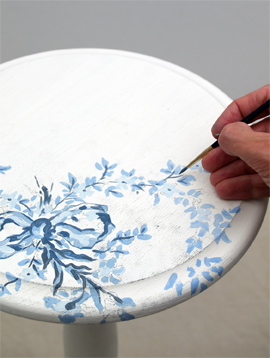
Painted Floral Details
Floral patterns used as accents in fabrics and furniture are common place details in the English Country home. These graceful and organic patterns complement the cozy interior of this style and work particularly well with lace window treatments, an heirloom tea service set and the natural and rustic charm of wooden ceiling beams and slightly irregularly textured walls.