How to Silver Leaf a mirror frame - Best how-to!          

Silver Leaf Mirror Frame – Oil based method

Genuine Gold or Silver Leaf applications on picture frames, mirrors and objects are delightful ways to add enhancements to the rustic interior. I’ve chosen to use Genuine Silver Leaf for this demonstration, as I love the softness and slightly aged patina that results with a Silver gilt object. This application method holds true for use with Genuine Gold and metal leaf as well. 

Color Essentials

Interior color mixing ideas
Mixing with Color.

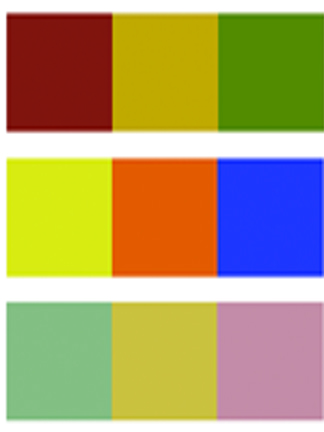
Create custom color schemes and color effects in your home or office. Learn how to use the best base color, create a glaze, mixing colors, and more. Using color at home or in the office - for paintings, furniture or any artistic challenge - takes a good eye, a little know how, and a creative imagination.

more


gildoil-step-1

Step 1:

Once my frame is been suitable primed I begin by painting the entire surface with Charcoal Black latex eggshell paint. 


gildoil-step-2

Step 2:

Applying Gilder’s Size

When using genuine leaf, I’ve found that oil sizing provides a superior final finish over its water based counterpart. Therefore, I’ll be using an oil-based 3 hour adhesive sizing. This ‘quick size’ becomes tacky and able to receive genuine or metal leaf after about 1 ½ hours and remains ‘open’, or sticky, for about 2 hours before it dries completely and the leaf will no longer stick to the surface. I apply the size using a ¾ inch Flat Artist Brush, insuring there is no pooling in the recesses and crevasses.


Antique Glazes and Aged Finishes
Antique paint glaze

Antique Glaze Create the perfect antique finish. Furniture, objects, paintings, wall and ceilings. Our exclusive line of custom antique glazes are idealy suited for interior and exterior applications. This acrylic based medium is eco-safe, easy application and clean up, with enhanced color saturation. Great for all weather conditions. Pre-mixed colors for historic application, thematic and geographic design styles.

more


gildoil-step-3

Step 3:

Testing the ‘Tack’

Apply the leaf when the sizing has reached ‘tack’. I determine this by gently running the back of my knuckle over the surface. If you hear a squeaking noise, or a gentle pulling on the hairs of your fingers, you are ready to apply the leaf.

If your adhesive is too wet when you apply the leaf you notice wrinkles and sagging in the final finish. In addition, the wet adhesive will tend to be pulled over the leaf causing your leafed surface to dull and often crack and separate making it necessary to begin the process again.


gildoil-step-4.jpg

Step 4:

Laying on the leaf

Patent Silver Leaf, or Silver leaf backed with thin paper, is ideally suited for this type of project. It allows for easy handling and manipulation of the leafing material. First, I remove a single sheet from the book of leaf and gently lay it onto the tacky surface. I’ll rub over the paper backing to adhere the Silver and then gently remove the paper. 


gildoil-step-5

Step 5:

On curved or ornate surfaces, such as this, you’ll notice that the leaf sticks to the higher areas, leaving the recesses untouched. 


gildoil-step-6

Step 6:

Simply use some of the remaining leaf that is attached to the paper to fill in the deeper areas. 


gildoil-step-7

Step 7:

You can also trim the sheets of Patent leaf with sharp scissors to create smaller strips for tricky areas.  


gildoil-step-8

Step 8:

Burnishing and finishing off.

Now that I’ve Silver gilt the frame I will soften and smooth out the surface, removing any loose skewings and filling in any areas that might require it. This is best achieved with my ¾ inch goat hair gilder’s brush


gildoil-step-9

Step 9:

The Antiquing Process.

The antiquing of genuine Silver or Gold leaf is a three stage process. I’ll begin by lightly distressing the leaf, wearing it away to reveal some of the under color. This mimics the physical distressing that would happen naturally over time due to rubbing or cleaning of the frame surface. Wrap a small ball of 0000 steel wool in a strip of cheese cloth and create a small ball or distressing pad. The cheese cloth helps soften the abrasive quality of the steel wool. 


gildoil-step-10

Step 10:

Gently rub the Silver leaf with the distressing pad in even motions. You’ll soon notice the base color being revealed.


gildoil-step-11

Step 11:

Apply a clear coat sealer

Before I apply the final colored antique glaze it is necessary to seal the Silver leaf with a clear coat to protect the luster and shine of the leaf, as well as creating an oxygen barrier so the Silver does not naturally tarnish over time. Rolco’s Acrylic Top Coat Satin sheen sealer is an excellent product for this purpose.


gildoil-step-12

Step 12:

Apply the antique glaze

My goal is to imitate the natural color of lightly tarnished Silver leaf. On a paper palette, I’ll place my three artist oil colors and loosely mix a blend in equal proportions. Mixing as you go, rather than creating a batch of pre-mixed color, works well for this treatment, as subtle variations in color add to the natural aged and tarnished appearance. 


gildoil-step-13

Step 13:

Loosely apply the glaze over the entire surface using the ¾ inch Flat Artist Brush.


gildoil-step-14

Step 14:

Take a clean rag and rub off the majority of glaze, leaving a thin film over the surface. A 1 inch dry brush will help soften the color out of the recesses and crevices of the frame. 

Related Features