How to Create an Antique Bronze Finish
Easy faux finishing techniques for achieving the look of aged bronze on metal, wood, and decorative surfaces.
An antique bronze finish captures the depth, warmth, and character of naturally aged metal without the need for casting or chemical patination. Using simple faux finishing methods, simulated bronzing effects can be applied to metal surfaces, wooden objects, furniture, architectural details, and decorative accents to convincingly replicate the appearance of genuine bronze.
This step-by-step approach combines metallic paints, bronzing powders or mica pigments, and subtle glazing techniques to build realistic patina, highlights, and time-worn variation. Ideal for do-it-yourself home improvement projects and professional decorative painting alike, antique bronze finishes add a sense of history, craftsmanship, and refined elegance to both interior and exterior applications.
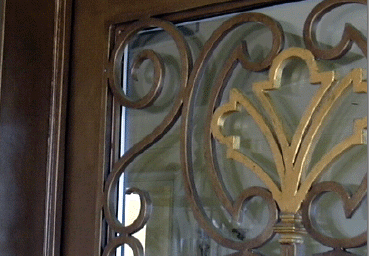
Whether on entrance doors, coffee tables, stair railings, mirror and picture frames, this decorative treatment will impart the impression of strength and hardness to old-world, or contemporary furnishings and fittings alike. This faux Bronze entrance way creates a sophisticated formal look, a solid first impression as you cross the threshold of this residence.
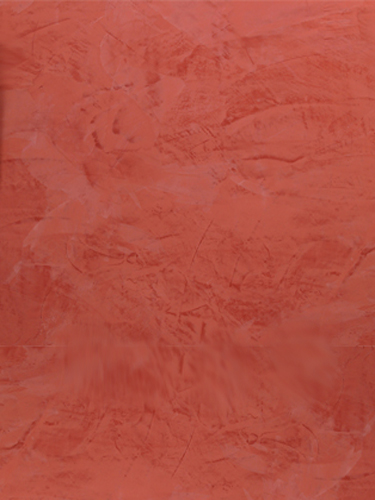
Rustic Style Classic Elegance
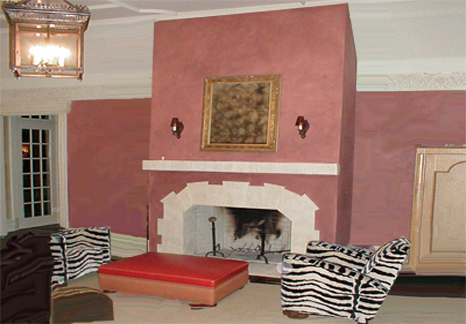
Stucco Rustico or Aged Plaster is a Traditional interior and exterior textured plaster that epitomizes the rustic old world charm commonly associated with Old World environments. Stucco Rustico is a lime based texture coating for interiors and exteriors. When coated with Velatura, it provides a natural stone look and feel. It can be tinted on its own, however, for added depth and shade, Velatura becomes a fundamental addition to the product’s final effect. Overall, Stucco Rustico is a mold-proof, restoring, transpiring, disinfectant, textured stucco paste for residential and commercial use.
This treatment is quite versatile for interior and exterior application.
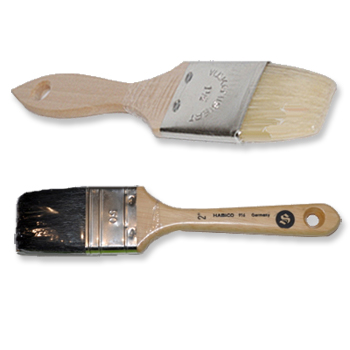
Varnish Brushes
High-quality brushes for varnishes, sealers, primers, and glaze topcoats.
Varnish Brushes
Highest quality flat brushes for the application of varnishes. These brushes are made of high quality natural hairs. Square brushes allow precise application of material, excellent coverage and consistent build-up of material. These square brushes are the applicators of choice for base coats of oil paint, sealers, primers and top coats of glazes.
Step 1: Preparing the surface
This decorative technique can be created on any type of furniture or object. You can use new, unfinished furniture, an old antique, or even a painted object. Whatever the surface may be, you will first need to prime then apply a base color.
Step 2: Priming and undercoating
Where necessary, remove all nails and repair any damaged or cracked areas. Place protective drop cloths around object or furniture, and tape any areas not meant to be painted or refinished. Refer to the artSparx basic preparation resource for tips and techniques.
A good quality primer will always result in a higher quality final finish. If creating the Bronze patina over a metal surface it will be necessary to use an oil-based metal primer. Over objects, frames and furniture, water-based primers will suffice.
Step 3: Sanding / deglossing
If the surface is glossy, lightly sand or degloss so the primer and base coat bond properly. Wipe clean and remove dust before moving on.
Choosing the base color
There are two options for creating the reflective base tone required to successfully simulate the faux Bronze patina. The first is created using gold paint, and the second is created over gold or imitation gold leaf.
Do not use spray gold paint! Metallic spray paints do not have a strong enough protective sealer to allow a bronze effect to work properly. Should you glaze over metallic spray paints, the brass particles suspended in the spray paint binder will flash and turn brown, resulting in loss of color and metallic reflectivity, both essential to create an effective bronze appearance.
Step 4: Applying gold undertone
Use "Hammerite metallic gold paint". It is an industrial strength metallic paint, often used for radiators and metal surfaces. Apply with a mini roller in clean even motions whenever possible. Avoid overlap marks that create a darker seam. A smooth appearing gold surface will provide the best results.
To create a gold leaf or imitation gold leaf surface, follow the gilding tutorials at the artSparx Gilded Corner, then complete the effect with the following glazing technique for the bronzing patina.
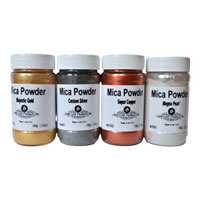
Mica Powder
Highlight your bronzing patina with these high quality mica powders.
Mica Powder - Perfect for artists and craftsmen alike, these powders have many uses and mix with clear vehicles ranging from acrylic and oil based mediums to shellac. You control the pigment content - use very little for a translucent veil of metallic or use more for a solid metal look. Intermix colors to create your own mica palette. Ideal for "Flash Gilding", where you apply the mica directly over size that is at perfect tack.
Step 5: Creating the bronzing glaze
Mineral spirits, Raw Umber and Burnt Umber Universal Tinters, antique Bronze mica powder, satin sheen oil based varnish and clean brushes and rags are the essential ingredients.
In a 2.5 quart bucket mix satin sheen oil based varnish with your Universal Tinter colorant. Mix Raw Umber and Burnt Umber in a 4:1 proportion (RU:BU). You will need to create a strong, dark varnish glazing mixture. For example: 80 drops of Raw Umber and 20 drops Burnt Umber mixed into 1 quart of oil based varnish. Test on your painted surface and adjust as needed.
Add 1/4 cup mineral spirits and 1 oz. bronze mica powder. Mix thoroughly. You have now created the bronzing glaze. Because varnish is heavier than mineral spirits, it will be necessary to continually stir the bronze glaze mixture, occasionally adding small amounts of mineral spirits to keep the glaze fluid and prevent it from becoming too thick and dark.
The bronzing process
The bronzing patina is created by using the "Pouncing" effect. You will need 2 clean brushes and a clean rag. The first brush will be used to apply the glaze, the second for creating the pounced "Bronze" effect. For small surfaces a regular 3 inch brush will suffice to create the effect. For larger surfaces you can purchase a stipple brush or create your own.
Pounce or stipple brush: You can buy special commercially made pounce brushes. They tend to be expensive, so it is important to constantly clean these brushes during use to prolong their use and to protect your investment.
Step 6:
Wearing protective gloves, begin the bronzing patina by wetting the surface with a rag moistened with mineral spirits. This will allow the glaze to flow easily over the surface. Do not get the area too wet, as the glaze will run and sag.
Step 7:
Using a clean brush, apply the bronzing glaze over the surface. Loosely brush over an entire segment, ensuring complete coverage. Start your project from the top, or highest point, working towards the bottom. This helps prevent drips from landing on lower portions that have already been glazed. On large areas work in segments, progressively working from one area to the next.
Step 8:
Using the pounce brush, begin the pounce process by hitting the surface directly with the bottom of the brush, holding the brush perpendicular to the surface. Use a firm hand and continually move your wrist to vary the pattern being created. This will remove freshly applied glaze from the surface, revealing the base color and producing a spotty or sandy texture.
Regularly wipe the brush dry with a clean rag to remove excess glaze and to ensure a fresh pounce pattern. Work evenly over the surface.
If glaze is too fluid and continually “sags” or runs, allow it to set momentarily then return and work the glaze with a dry brush until smooth. Be aware that oil-based glazes set quickly.
Retain some of the master glaze for future touch ups in a covered glass container. Dispose of remaining glazes properly.
Step 9:
Move to the next area and repeat. Do not stop until the entire surface has been treated. Do not put glaze on the previous edge; instead apply within 1 inch or so and soften into the previous edge with your pounce brush or another dry brush.
Corners and difficult edges At corners apply glaze to within 1/2 to 1 inch of the edge and, with a dry brush, work into the corner. Then soften, smooth and pounce with a smaller brush. Use light, gentle movements.
Optional
Adding the final details with bronzing waxes. We've created a bronzing patina on the central wrought iron stair railing. Because of all the edges and interesting curves, we set out to highlight the bronze effect by using bronzing and gilding waxes.
Once the bronze surface is completely dry, apply gold or bronze gilder's wax on the edges and corners of the surface or object. Simply dab a clean rag into the gilder's wax and gently rub over the high points or edges to create a softened, buffed metallic edge.
Finish off by accenting details and buffing high points for the truly polished and hard metallic appearance of genuine bronze.
Fixing drips and spills
Important Tip - If wet glaze gets onto an area that has already been finished and has begun to set, it may dissolve the previous finish. Simply blot the area with a dry rag to remove excess. Any attempt to repair the area before it is completely dry may result in a mess that is virtually irreparable.
Small area repair: Once completely dry (24 hrs.), fresh glaze may be touched in with an artist's brush until desired results are achieved.
Large area repair: If a large area of glaze is affected and begins to burn away or dissolve, the removal of the entire glazed surface may be required. To do this, dampen a rag with mineral spirits and wipe the surface until clean, using multiple rags if necessary. Alternatively, you may allow the wall to dry completely (24 hrs.), then repaint base coat and begin again.
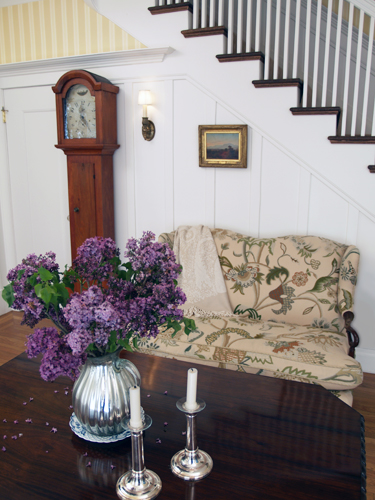
Early American Style
Colonial Amercians drew inspriation from their European heritage. Curent design styles would filter across the ocean and become reinventedin early America. Proportion and scale took reign over ornementation, A neutral color palette of grey blue, greens and rose pinks is readily apparent.
Venetian Plaster
Polished Plaster, or Stucco Veneziano, is a Traditional wall treatment that provides a glossy, visually textured wall finish. Venetian Plaster is a natural formula composed of organic ingredients, calcium, and acrylic binders creating a decorative paste plaster for interior applications. Polishing the surface compresses the calcium within the compound, creating a marble-like finish, cool and hard to the touch.
This treatment is quite versatile, ranging from a rustic backdrop to a refined and elegant finish.
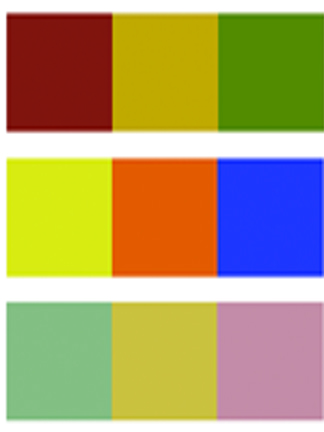
The Rustic Color Palette
The Rustic Style color palette falls within a distinct range of color tones and is essential in creating a successful Rustic interior. By using the appropriate color tones you can create a variety of design styles ranging from Period and Historic, regional or thematic.
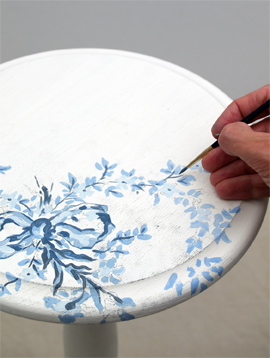
Painted Floral Details
Floral patterns used as accents in fabrics and furniture are common place details in the English Country home. These graceful and organic patterns complement the cozy interior of this style.