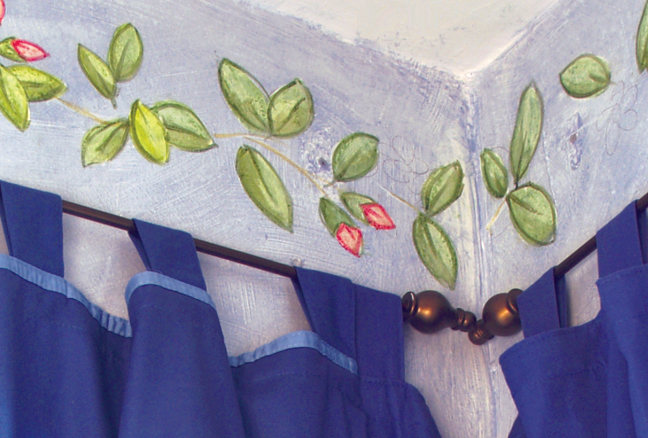
Floral Ceiling Border
This hand painted floral pattern creates beauty and personality in any room.
Floral Ceiling Border
One of the defining elements of English Country style is the use of floral patterns as borders and trim around ceilings and walls. When rendered in an easy, loose manner, the room takes on a personality that feels lively and full of character. From lamp shades to textured carpets to throw pillows, an English Country interior can range from the harmonious to the delightfully eccentric.
By pulling together a variety of color tones, this technique offers a natural way to unify the disparate color schemes often found in the style. A simple color palette is used in this example, though the most charming results often come from borrowing colors already present in the room.
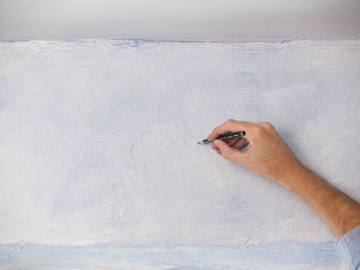
Step 1:
By using references that I’ve found in design magazines and on the internet, I begin to sketch out the floral pattern with a pencil directly onto the wall. Essentially I want to create a visually even and fluid motion to the flower pattern, so every element ties nicely together.
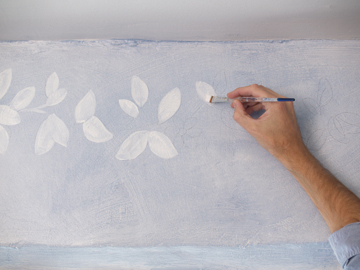
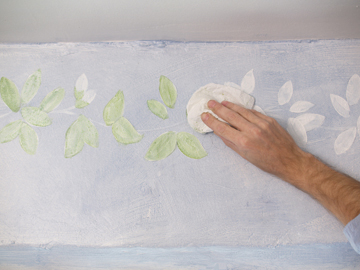
Step 2:
Next I fill in the outlines using white paint. By establishing an opaque base the painted elements are able to maintain rich, sharp color tones. When the white paint is dry erase any visible pencil markings with a kneaded eraser.
In this tutorial I’m applying my painted floral border over a wall that has a medium toned base color. If your border will be applied over a white or off white base tone, then Step 2 is not necessary.
Feature Tutorial: Americana-Inspired Floral Border
Floral borders aren’t only for English cottages. They also feel right at home in Americana Style, where hand-painted details, honest materials, and a little folk-art charm make a space feel lived-in and welcoming. The difference is mood: English Country tends to be soft and romantic, while Americana is often simpler, sturdier, and a touch more graphic.
Think of this border as the finishing stitch on a quilt. It frames the room, adds gentle rhythm, and quietly ties your colors together—especially in kitchens, hallways, powder rooms, and anywhere you want a friendly dose of personality.
Americana color recipe (classic + easy)
- Base tones: antique white, warm cream, or a soft putty neutral
- Florals: barn red, muted blue, and a dusty rose
- Leaves: sage green warmed with a hint of raw sienna
- Shadows: deep umber or navy for crisp definition
Placement ideas
- Along the ceiling edge over beadboard or plaster
- Across exposed beams or above a chair rail
- As a simple frame around a panel effect or painted stripe
Explore Americana Style
If you love the handmade, collected feel of folk art, you’ll find more inspiration in Americana Style—a design approach that celebrates craft, heritage, and simple, heartfelt decoration.
Quick steps (beginner-friendly)
- Mark your border height with tape or a light pencil line.
- Sketch simple blooms, buds, and curling stems evenly.
- Paint leaves first, then flowers, then add outlines/shadows.
- Keep the brushwork loose—Americana thrives on hand-drawn charm.
- Seal the border if it’s in a wipeable, high-use area.
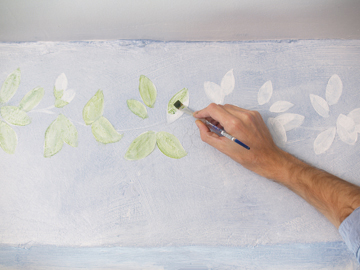
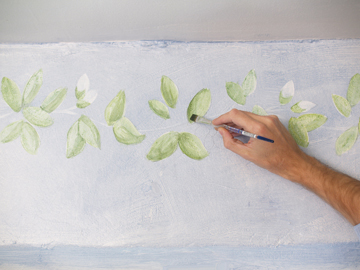
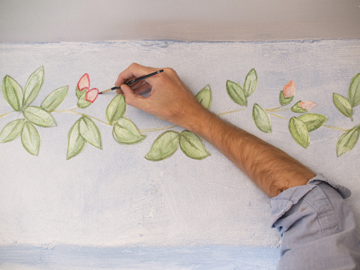
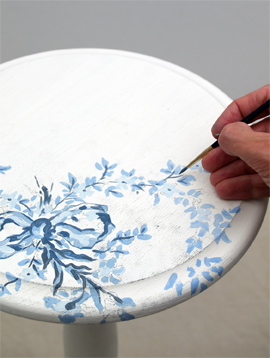
Step 3:
With the No 3 brush I mix together Sap Green with a small amount of Raw Sienne. Paint all the leaf forms first.
Step 4:
As you are painting, blot the leaves with a rag or paper towel to create a slight texture and minimize brush lines.
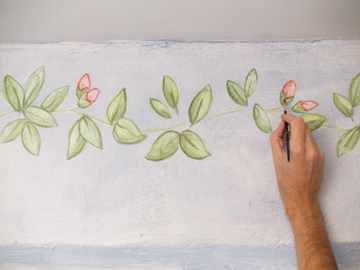
Step 5:
Add an accent shadow by mixing Sap Green and a small amount of Raw Umber. Loosely paint portions of the leaf form. Blot these areas again to soft the color.
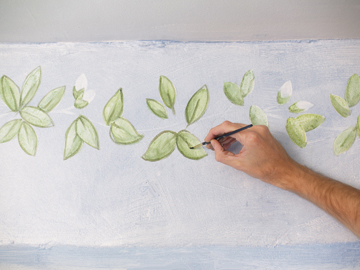
Step 6:
Next, still using the darker green mixed from step 5, I’ll outline the leaves, add a central vein and highlight any branches with an accent.
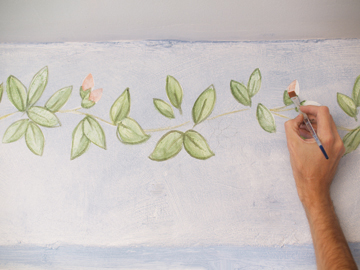
Step 7:
I’ll paint the flowers and buds in a similar fashion. I mix up Cadmium Red and a touch of Raw Sienne and wash over the flower forms. Using the rag, I blot the color off, leaving a slight textured appearance.
Blending Traditional and Contemporary Design
Stucco Veneziano - Venetian Plaster!
Inspired by the ornate plaster-work of Renaissance Italy, decorative plaster has a millennial history, with origins dating back to the Rome of the Caesars and the art of Ancient Greece.
It was Andrea Palladio, a famous Italian architect, who in the XVI century re-discovered it through his studies and re-proposed it in the splendid Venetian villas that are still to this day the distinguishing mark of his career. Stucco Veneziano is an aesthetic solution that step by step, conquered Venice and Lombardy, then Italy, and finally entire Europe in the XVII century. Today, venetian plaster Stucco Veneziano restores the splendor of a classic and prestigious finish.
Step 8:
Outline the flower shapes with the same dark red.
Step 9:
Complete the process by adding a darker accent or shadow line by mixing Cadmium Red, with a small portion of Raw Umber and Ultramarine blue.
Add additional colors to the flowers to adapt to the color scheme of your room. Simply follow the same procedures substituting blues, yellow, purples, etc. for the red color described above.

Hydrocote Polyshield Clear topcoat - Gloss or Satin
Water Based
Hydrocote Topcoat. Polyshield Clear topcoat is a water based non-yellowing polyurethane sealer. This sealer is water clear with exceptional clarity. It dries quickly to a hard durable finish. It is resistant to water and marring when fully cured. Polyshield is UV stable which keeps it from yellowing over time.
Hydrocote Polyshield is available in gloss and satin. It is non-flammable, non-toxic and environmentally safe.
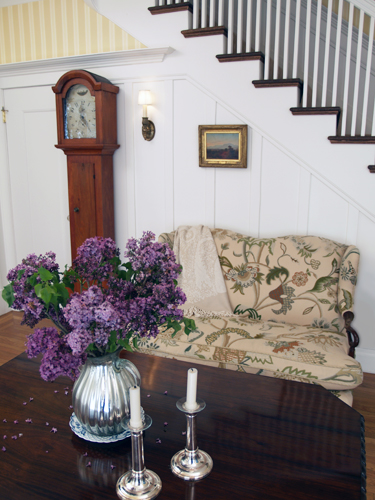
Early American Style
Colonial Americans drew inspiration from their European heritage. Current design styles would filter across the ocean and become reinvented in early America. Proportion and scale took reign over ornamentation. A neutral color palette of gray blues, greens and rose pinks is readily apparent.

Venetian Plaster
Polished Plaster, or Stucco Veneziano, is a Traditional wall treatment that provides a glossy, visually textured wall finish. Venetian Plaster is a natural formula composed of organic ingredients, calcium, and acrylic binders creating a decorative paste plaster for interior applications.
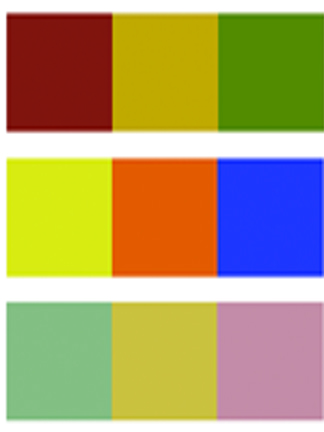
The Rustic Color Palette
The Rustic Style color palette falls within a distinct range of color tones and is essential in creating a successful Rustic interior. By using the appropriate color tones you can create a variety of design styles ranging from Period and Historic, regional or thematic.
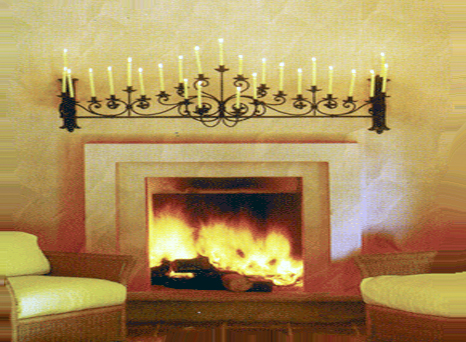
Painted Floral Details
Floral patterns used as accents in fabrics and furniture are common place details in the English Country home. These graceful and organic patterns complement the cozy interior of this style and work particularly well with lace window treatments, an heirloom tea service set and the natural and rustic charm of wooden ceiling beams and slightly irregularly textured walls.