Antique Striee Glaze
Create the soft glow of antique Ivory finish. Old world grace or rustic charm.
Striee Glazing
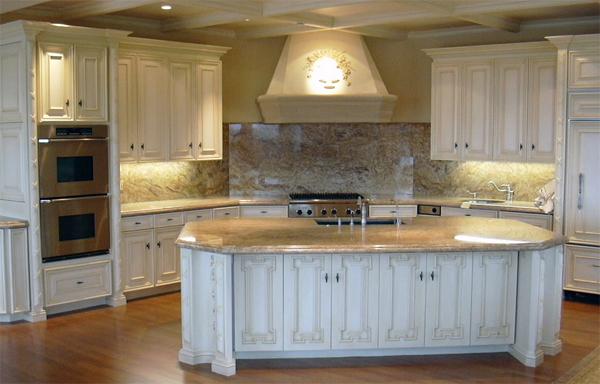
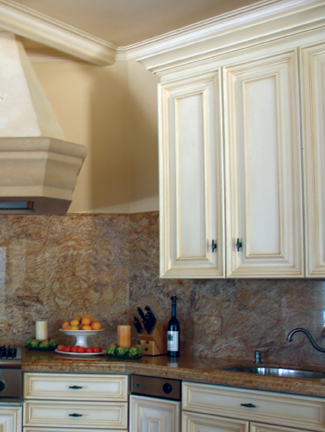
No treatment evokes antiqued sophistication or a rustic charm feel more than the classic Striee glaze. Applied on a variety of interior surfaces, this treatment is ideal for creating just the right charm to your kitchen cabinets, a bit of sophistication in your bath or powder room or country elegance on your interior doors, trim and window surrounds. Using a heavy hand during application creates a true rustic feel, while a more controlled approach creates casual charm and quite grace.
Antiquing Video Tutorial
Turn ordinary objects into heirlooms! Creating the 'Classic Antique' glaze finish for objects, furniture, walls and more. This detailed step-by-step tutorial shows how to mix the right colors to create the perfect antiquing solution for any object, furniture, picture frame and more.
Color Palette
Create a history for your antiqued objects.
The best approach to antiquing is to think in terms of the passage of time. What would happen to any given object as it matured through time? Passing from one owner to the next, or resting quietly in the back of a dusty shop. Dirt starts to settle. As people clean or move these objects around, the high points, edges and top would naturally be exposed to polishing, rubbing or knicks and dings. Meanwhile, the recesses and deep areas slowly become more distinguished as they settle and mature. In step 8, above, we see just that. The buffing of the ‘high traffic’ points, while our newly applied antique glaze stays put in the details.
The 'Classic Antique Glaze'. A blending of Raw Umber, Van Dyke Brown and Burnt Sienna colorant.
Base color – Antique White

Glaze color – Champagne Straw
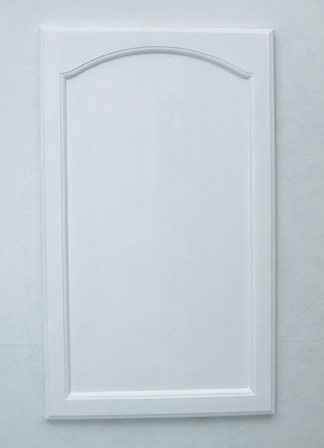
Step 1:
Applying base color.
Apply the base color, Antique White, over your sanded and primed door panels and casings. A mini roller and 3 inch brush combination works will to insure a smooth base upon which to work.
Step 2:
Mix the glaze
The Glaze solution is created by mixing Raw Umber, Raw Sienna and Burnt Umber in a 5:4:1 ration respectively. Mix Universal Tints with glazing liquid and water. Not more than a quart of glazing liquid is generally needed and this can be mixed with up to 3 quarts of water to create a fluid solution about the consistency of milk.
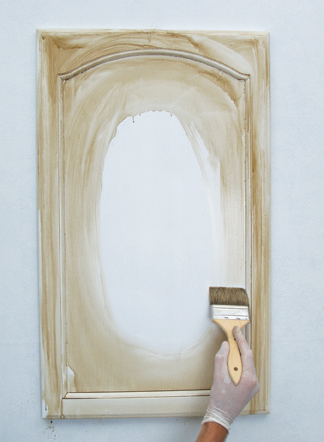
Step 3:
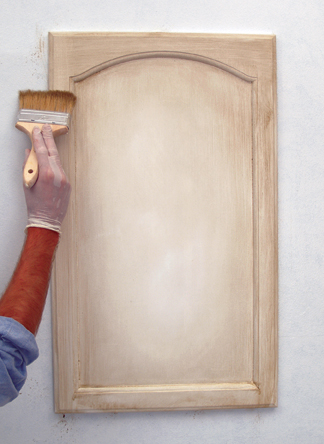
Apply the Glaze.
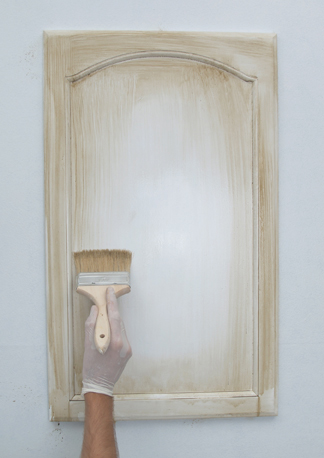
I begin by wetting the panel to be glazed with water. When creating this treatment I like to create a ‘halo’ effect, keeping the center panel slightly lighter, and the outer edges slightly darker to increase the ‘antiqued’ appearance. Using the 3 inch brush, I’ll apply the glaze on the outer frame and work inward, keeping the center area void of color.
Step 4:
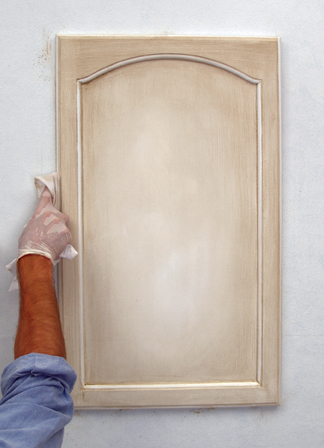
Drag glaze.
With my second, dry 3 inch brush, start in the center panel and drag the glaze up and down in straight, even motions, pulling glaze into the center area in the process. Methodically work across the panel.
Regularly wipe your dry brush with a clean rag to keep it clean and dry while dragging the glaze.
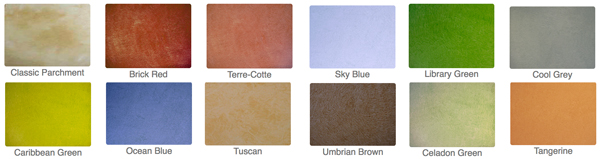
Pre-mixed Glazes
Ready, set, GO!
Getting going with these premixed glazes. Select one of our pre-mixed glaze colors or create your own. We custom mix any color from all major paint manufacturers. Just pick your own color from any swatch book and let us know the paint name and number and we'll send you the right glaze - interior or exterior - custom matched to your liking.
Create classic effects such as colorwashing, dragging, striee, antiquing effects, furniture effects and much more!
Step 5:
Drag outside frame.
Work on the top and bottom outside frame by dragging in one even horizontal motion.
Step 6:
Finish frsame.
Finish off the left and right frame, again brushing in even up and down motion.
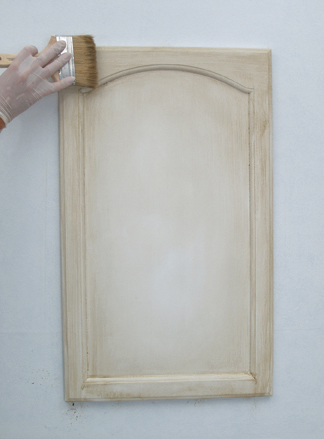
Step 7:
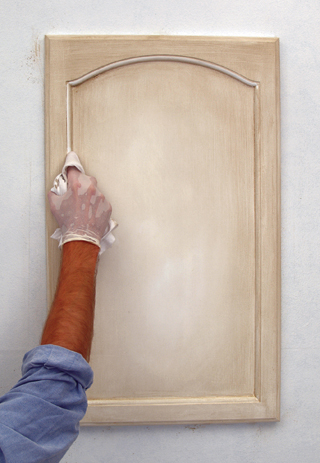
Clean outer edges.
Complete the effect by wiping clean the inner and outer edge of the panel. Wrapping a clean rag over my finger allows me to carefully wipe the edge clean. This final effect accentuates the profiles of the cabinet door, adding character and reinforcing the antiqued appearance.

Early American Style
Colonial Amercians drew inspriation from their European heritage. Curent design styles would filter across the ocean and become reinventedin early America. Proportion and scale took reign over ornementation, A neutral color palette of grey blue, greens and rose pinks is readily apparent.
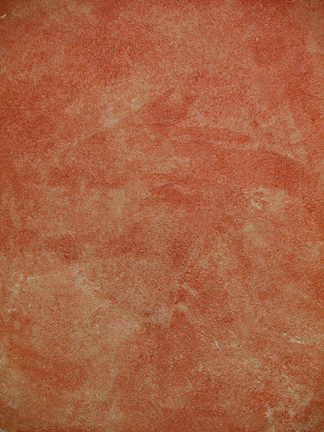
Stucco Rustico - Aged Plaster
Stucco Rustico is a Traditional interior and exterior textured plaster that epitomizes the rustic old world charm commonly associated with Tuscan environments. I love this treatment for its ease of application and the natural, organic glazed appearance that results when using mineral based plasters and glazes. Whether a rough application or a smooth finish, this treatment holds true to the test of time and, in fact, feels as if time itself stopped to wash the walls personally.
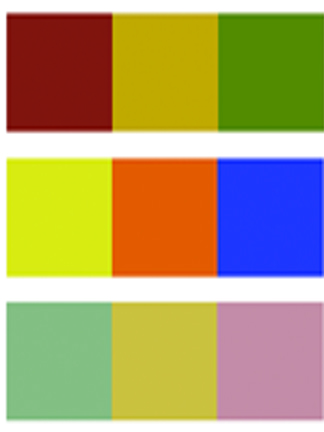
The Rustic Color Palette
The Rustic Style color palette falls within a distinct range of color tones and is essential in creating a successful Rustic interior. By using the appropriate color tones you can create a variety of design styles ranging from Period and Historic, regional or thematic. Color helps define our experiences within an interior and exterior environment. It affects us on a physical, emotional, and spiritual level and can be calming and passive, expressive and vital.
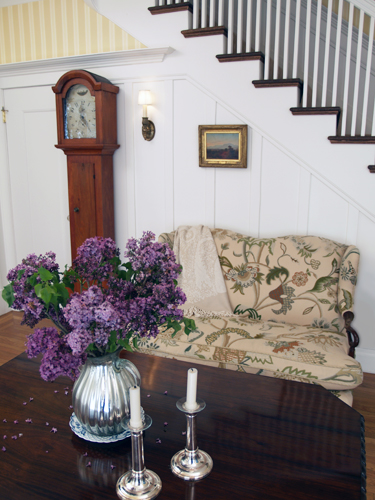
Painted Floral Details
Floral patterns used as accents in fabrics and furniture are common place details in the English Country home. These graceful and organic patterns complement the cozy interior of this style and work particularly well with lace window treatments, an heirloom tea service set and the natural and rustic charm of wooden ceiling beams and slightly irregularly textured walls.